Baitcaster Birds Nest: What is it and How to Prevent it?

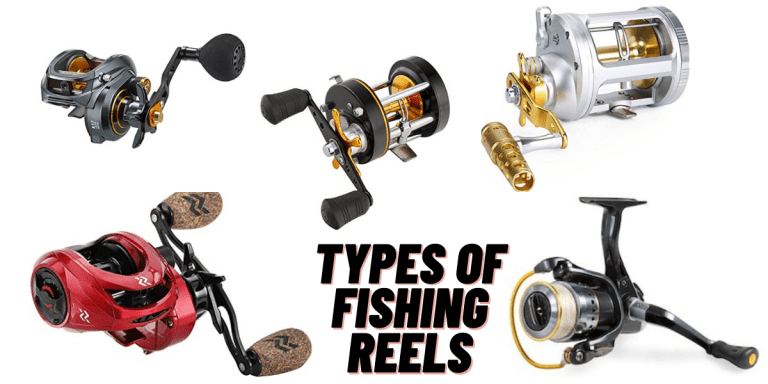
Baitcasters are some of the most popular fishing reels, as they offer superior control and accuracy over the lure and where it lands. The winching nature of the gears in a baitcaster reel provides a lot more torque, which gives anglers and fishermen more power to reel in fish, and unlike spinning reels, the line is not twisted in a baitcaster reel.

Baitcaster Birds Nest

However, people are unsure about purchasing this fishing reel as it is prone to form a bird’s nest or a backlash. This article will talk about backlash, why it happens, and how to fix and prevent it from happening in the future.

What is a Baitcaster Bird’s Nest or Backlash?

Baitcaster bird’s nest happens because the spool is overrun when you cast a lure. The spool starts rotating when you release the clutch, and your line gets cast. However, sometimes, the spool spins too fast, and the line doesn’t peel fast enough, leading to the nesting of the line in the reel, which is known as a bird’s nest or backlash.

If the end of the line where the lure is attached is not moving as fast as the spool is throwing out the line, the wire starts bunching up inside the reel leading to a severely tangled mess.

A backlash can happen for many reasons. Some might be related to the settings you have on the tension knob, the drag control, and the brake control of the reel, while other times, it might be due to environmental factors you can’t control.

A bird’s nest or backlash can happen both before casting the line and after casting it. When this happens before the fishing line is cast, it is usually because beginners or inexperienced anglers haven’t gotten used to a baitcasting reel.

They will load up the reel for long distances without adjusting the various controls and setting in the fishing rod leading to an inevitable backlash.

Moreover, a bird’s nest is a more common occurrence towards the end of a cast. When the lure hits the water on its target, it slows down and will eventually stop, but the spool can still be spinning, leading to a backlash.

This is the reason why many anglers stick to spinning reels. They don’t want to deal with such a scenario every single time.

However, with a few tweaks and a little bit of practice, you can prevent the frequency of a bird’s nest forming on your reel, and we will also teach you how to remove it from a baitcaster reel.

Components of a baitcasting reel

1.   Spool

The spool is housed inside the baitcaster reel and is open in the middle. One differentiating factor of the reel is that the spool spins when you rotate the handle as opposed to a stationary spool in a spinning reel which has a bail arm wrapped around the spool.

Also Read: How to Spool a Baitcasting Reel: A Beginner’s Guide

2.   Reel foot

The reel is attached to the rod by the reel foot, providing balance and support. A baitcaster reel is mounted on the top of the rod, facing the angler, while a spinning reel is attached to the bottom of the rod.

As the reel is mounted on the top of the rod, it makes baitcasters very easy to handle for an extended period.

3.   The drag control

The drag control is located right beside the handle. It is also known as a star drag due to its star-like shape. Suppose you’re fighting a powerful fish; if you have loose drag control, the fish can very quickly pull the line off your reel, allowing it to find cover which might snag your line in some obstacle.

On the other hand, if your drag control is too tight, you run the risk of snapping your fishing rod in half and getting pulled into the water yourself if it is an especially strong and powerful fish.

So you need to find the sweet spot in between, depending on the type of fish, where the drag control doesn’t have too much to give but at the same time isn’t wholly rigid to ensure you catch the fish.

4.   Braking system

The braking system is an essential part of the baitcaster reel as it allows to slow down the rotation of the spool to prevent a backlash. There are two types of braking systems; centrifugal and magnetic.

To use the centrifugal brakes, you have to remove the side panel and slide all the centrifugal brakes into active positions. It is recommended you do this before casting the line.

While the magnetic braking system usually has a dial located on the reel frame, which can be adjusted on the go.

5.   Tension knob

The tension knob is the second way to adjust the rotation of the spool. This is also located on the same side as the handle, close to the star drag.

The spool tensioners work more on the last part of the cast when the lure is about to hit the water. They prevent a bird’s nest from forming by slowing down the rotation of the spool.

You should start by adjusting the braking system first and then move on to the tensioners.

Moreover, as lures vary in size and weight, adjusting the tensioners will change. So, keep in mind to fine-tune the tensioners whenever you change lures.

6.   Clutch

The thumb bar or clutch releases the line when you’re ready to cast the line. After the clutch is pressed, it causes the spool to spin freely by disengaging all the gears from the spool.

More info: What are the parts of a baitcaster reel, and how to use them?

How to avoid a backlash?

We will now learn how to set up a baitcaster to avoid a bird’s nest and cast a baitcaster without forming a backlash. It is essential to know how to control the spool’s rotation speed when you cast the lure to prevent this from happening.

1.   Use the centrifugal brakes

Set all the centrifugal brakes in their active positions if you’re a beginner. This will reduce the distance you can cast your line, but it will prevent a bird’s nest from forming before the line is even cast.

2.   Magnetic brakes

Usually, most baitcaster reels come with both centrifugal and magnetic brakes. You can set the magnetic brakes at half capacity to gauge if it’s suitable for you, and then you can make adjustments if needed.

3.   Spool tension knob

This is the second way to control the rotation of the spool. There is a simple way to test if you’ve set the correct tension or not. Tie a lure to the end of your line and hang it in the air. Now, press the clutch bar to disengage the gears; this will cause the lure to drop down and hit the ground.

If you’ve set the correct tension on the knob, the spool will not spin after the lure hits the ground and stops. Adjust the tensioners if the spool keeps rotating even after the line hits the ground until the rotation stops.

How to fix a bird’s nest

Untangling a bird’s nest can be a headache for inexperienced anglers who don’t know how to thumb a baitcaster properly.

If you get a backlash, you mustn’t pull on it too hard as it might make it tighter and lead to your line breaking off if the knots are especially nasty.

Here are some tips you should follow to help unravel the knots in your spool and get back to fishing in no time.

Tighten down the star drag on the reel, push your thumb down, and apply pressure on the spool as you turn the handle.

If you want to run the knots underneath your thumb to untangle them, do it for all of the knots. After that, pull on the line and give it a test run to see if the knots come undone. Keep clearing the line till all of the affected parts are out. When you’re sure, all of it is out, place the line between your fingers and reel it back while applying pressure on the line.

This is how you untangle a backlash quickly without any tools.

FAQ

1.   What type of line to use in baitcasters?

You should spool your reel with a monofilament line, as braided lines are unforgiving, and a backlash with braided lines is notorious and almost impossible to remove.

Since braided lines are made with multiple synthetic fibers woven together, the bird’s nest that forms in these lines is very pesky and a pain to deal with.

2.   Is backlash avoidable entirely?

No, at some point, you are going to suffer from backlash. Even pro anglers do at some point. It’s not about getting rid of them but knowing how to fix them when they happen and reducing their frequency of occurrence.

Conclusion

We hope this article helped you understand why backlash or a bird’s nest forms and how to prevent it from happening. You now know what to do when your baitcaster suffers from a backlash.

It can be very discouraging for beginners if their baitcaster keeps birdnesting, but it all boils down to practice and tuning your kit properly to manage them effectively.

As always, stay safe on the waters and have happy fishing.

Additional:

Spinning Reel Parts & What To Look For When Buying A Reel

It’s important to know how a spinning reel works and the parts of a spinning reel when you’re learning how to fish. Many spinning reels are called open-faced reels. These are the reels most commonly used by beginners. Their ease of use and lower tendency to tangle make them very popular among beginners.

Therefore, understanding how their system is essential for being able to identify quality products. In this guide, we have explained all the parts of a spinning reel in complete detail. Continue Reading.

Spinning Reel Parts

Parts of a Spinning Reel

On a spinning reel, there are visible external parts and invisible internal ones. However, both are equally crucial. And, having the knowledge and good understanding of these parts is very crucial in the whole fishing game.

The following parts are present in Spinning Reels:

Handle

Handles are a critical component of spinning reels. A spinning reel is mostly known for its handle, which is the part that everyone is most familiar with. Naturally, this is the area of the spinning reel that the user can control and manipulate the most. This is why it is essential.

In order to bring the line back in, the user rotates the handle once the bait has been consumed. A spinning reel must possess a smooth, comfortable handle that is easy to grasp.

In addition, the reel’s handle should not be too big or too small. It will give everyone a good grip no matter what their hand size is. The handle is also suitable for both left- and right-handed individuals. Users hold the handle of the spinning reel with their non-dominant hand. Therefore, it doesn’t matter whether you are left-handed or right-handed.

Body

The reel’s focal point and central component bind all the features together. The body of the spinning reel is comprised of the foot, the support arm, and the gearbox. However, manufacturers may also include other elements depending on their design.

In general, most anglers prefer reels that are made of aluminum, graphite, or plastic. They are durable, long-lasting materials. But, in spite of the possibility of rust, metal oftentimes proves to be more reliable than plastic. And also, this reel is much less susceptible to warping, bending, or falling apart over time.

There are obvious differences in the shape, size, and composition of reel bodies. There are also a lot of variations within the spinning category.

The lures are also very easy to manipulate. Therefore, you’ll also see the colors and finishes of certain manufacturers on the body. Another factor is weight, which is highly influenced by the main material used to construct the body.

Spool

It is vital to consider this component. You will have a much better chance of catching fish if you give importance to this part of the reel.

Spools are the parts of reels that hold the line you cast to try and catch something. Spool design is extremely important. You might not be able to catch a fish if there are minor defects in its design.

Spools for spinning reels are generally of metal. Within the spool, the line is then woven around one axis. From there, the line is connected to other reel components to enable easy casting.

However, many people overlook the spool. Nevertheless, it is very vital. Your fishing abilities may be significantly limited if you purchase the wrong reel. So, before purchasing a spinning reel, you need to consider its length, size, and material.

Also Read: Spinning Reel Sizes – Choose The Best Size Reel For Your Purpose

Rod and reel are connected by the reel foot. For both reel components to remain stable during the quick action of casting, they should fit the reel body snugly. In order to fit the reel foot on the rod, it is rectangular in shape. And most often, the reel foot extends from the reel body.

It is usually made from the same material as the reel body, such as graphite or aluminum. In spite of the standards, there is often room for flexibility in the fit between reels and rod frames.

Novices should realize that the best test to ensure reels and rods match is to buy both items together and ensure that one fits with the other.

Rod seats are where the reel foot sits on the rod. This is easy to mark by metal fittings that hold the foot in place, or by a hollowing on the frame of the rod. The design of reel seats will vary from manufacturer to manufacturer. So, this part of the rod is usually different.

Drag Adjustment Knob

The drag adjustment knob may technically be another spool component, but it is an important one for spinning reels as well. Drag adjustment knobs are normally present in the spool as a set of buttons. By pressing it, the friction of the line is increased or decreased.

Bass fishermen should pay close attention to the drag adjustment knob. Because reeling them in is quite difficult and they are often resistant.

Drag adjustment knobs affect spinning reels’ drag abilities directly. Depending on which type you choose, it may be better or worse. Most drag systems consist of metal washers lining the spool. Mastering this system can be a challenge. Particularly for those who are new to fishing.

Open-faced spinning reels are common. This enables you to watch the spool turn with the line. This makes the drag system more difficult to master.

Due to this, it is not easy to learn to use the rod and reel together in less time. But, it is incredibly easy for your fishing trips to succeed once you have the drag system under control.

Gears

The gears on spinning reels are usually not the first thing that an Angler thinks of while purchasing a Reel. They do, however, play a crucial role in improving the smoothness of the reel’s action. Gears are mostly of zinc or aluminum. Stainless steel is also present in them.

The manufacturer is often responsible for gear cuts. Some brands have been cutting their gears in the same way for ages. Though gear cut to shape and material is not extremely important when it comes to the performance of reels, it’s still better to consider these factors when trying to improve the overall performance of reels.

The gear ratio is also usually related to the gear itself. Anglers are keenly aware of this. Gear ratios for spinning reels typically range from 4:1 to 7:1.

Stronger gear mechanisms require thicker gears. This will allow the load to go over a larger surface area. Keeping that in mind is important when fighting fish whose weight can vary greatly. Many anglers prefer to target big bass and thin, narrow gears may not be powerful enough to bring them in.

Anti-Reverse

In spinning reels, this component is essential to the drag system. A drag system will not reverse back when the anti-reverse is activating. Your fish will have a better chance of breaking free if they are able to fight against the line.

A spinning reel usually has an anti-reverse function that engages when needed. A switch is present to activate it. This allows users to turn it on whenever they need it.

Anti-reverses have the main goal of preventing the line from turning backward and releasing fish. In addition, they keep the line intact. The line is easy to tangle or break if you will force it backward. By preventing the line from moving backward, anti-reverse also makes sure your line is safe.

This also allows the user to use their line in a very flexible manner. For experienced anglers, this is crucial. As their techniques are refined over the years. Using this component will enable them to maintain that refinement.

Bail

Another important feature of spinning reels is the bail. This makes casting easier. This device helps in moving lines onto and off of the spool. Having the bail arm set down is crucial for preventing the line from freely running off the spool, thus reducing backlash. The bail is located anteriorly to the spool on the reel body. You can flip it up and down manually.

Nowadays, bail arms are of thin metal. The reel body is in a connection with the bail arm. Bail arms are easy to use on the reels which have good ergonomic designs. However, their resistance should be minimal. In addition, they should be strong enough to withstand repeated use.

Seat

The spinning reel’s seat is also a critical component. Your spinning reel cannot function without the seat. It acts as a link between the reel and the reel frame.

Seats on reels will mostly be rectangular. This makes it easier to attach the reel to the fishing rod. It is also typically a small addition to a reel. Moreover, its appearance will differ noticeably from other spinning reels.

This may seem like the most important part of the spinning reel to some people. Because it all depends on the rod seat and whether the reel will work with your rod.

Those who are new to fishing should purchase their rod and reel simultaneously. By doing this, you can ensure the components will work together before making your purchase.

A spinning reel’s seat varies according to the manufacturer, just as its body does. You will therefore see a variety of spinning reel seats.

Roller

Being the contact point of the line, the roller adds to the overall feeling of spinning reels. There is a tendency for anglers to want to avoid the friction caused by bad surfaces. This is especially true if you want to prevent the line from getting weak.

Line rollers allow the line to move freely without catching and sticking and are highly effective. Another benefit of a line roller is that it helps eliminate line twists.

Spinning Reel Parts Diagram

If you have never seen a spinning reel and want to have a quick look at its system then here is a simple spinning reel parts diagram.

Spinning Reel Parts Diagram

These are the basic components of a spinning reel that help to set it up correctly. Each of them is very important.

FAQS

What are the internal parts of a spinning reel?

Ball Bearings, Gears, and Drag systems majorly form the internal parts of a spinning reel. However, some custom reels also have some other parts.

What is the lever on the back of the spinning reel for?

The lever is the anti-reverse switch. It is a feature that is easy to turn on and off depending on the situation.

What is the knob on side of the spinning reel?

It is the drag adjustment knob that is very important while catching big fish. As it is the one that helps in generating drag to handle the fish.

Final Words

This is all about the parts of a spinning reel. A spinning reel contains a lot of moving parts. However, they are essentially simple machines. They are mostly for holding lines. They are also easy to cast and retrieve.

Therefore, beginner anglers often choose them as their first choice. This is because they are easy to handle. However, it is their accuracy that they lack. Even so, many professionals still prefer them to other popular options.

Also Read:

Best Bait For Tilapia & Tips To Catch Them In Simple & Effective Ways

The white meat of tilapia is delicious. And, in spite of its native origins in the Middle East and Africa, this fish is already been to several US states. You will need to visit fishing spots with freshwater or brackish water if you plan on catching tilapia.

Catching tilapia with an angling rod requires patience, skill, and knowledge.  Tilapia are usually shy so you need some patience. So, our goal is to give you the skills and knowledge needed for tilapia fishing to be easier, rather than teach you patience. In this article, you will learn how to catch tilapia.

About tilapia

Tilapia is the generic name for a number of species of Cichlids. Anglers often refer to the Nile Tilapia or Blue Tilapia while mentioning the term Tilapia. Worldwide, they are indigenous to tropical climates. However, they have been deliberately and inadvertently introduced in the US as well.

It is easy and plentiful to catch tilapia, which makes them popular with beginning anglers. You can catch tilapia with smaller rods and tackle and with an affordable bait. It is also not controversial to eat tilapia. It is common for them to eat all the vegetation in lakes, rivers, and ponds where they live. Breeding rates for tilapia are also extremely high, and they are rapidly displacing native species.

This is why anglers should hold on to them. And, if you are also planning to catch tilapia then here is what you need to do.

How to Catch Tilapia in a Pond

Catching tilapia

If you’re looking for how to catch tilapia in a pond, you must first know where to look for them. It is advisable to go to a place with brackish and shallow water. These conditions are ideal for these fish. You can therefore easily find them there.

Shallow water is the best place to be during the spawning season. You should also choose a site that has lush vegetation. The vegetation in this environment is what keeps tilapia safe from predators, so they thrive there.

Keep in mind that you must remain as silent as possible. Tilapia is a fish that is always in a scared state by noises. If they feel threatened, they will leave the place and go somewhere else. In other words, make sure you are using the right tools and being as quiet as possible.

As bait, you should ideally use canned peas and corn. When in such a situation, they are easy to attract to these baits. Set up a few rigs and hook a piece of frozen corn. After that, you can hook frozen peas. The area you choose for fishing should be one that you have surveyed a couple of days prior.

These fish prefer floating baits. Therefore, you need to position your bait directly in front of them. If you know where their beds are, then you can park the bait right there on the bottom. There should be no problem with the bed’s edge as well. You must also be careful not to scare your target off with your shadow. If you do, you might miss the opportunity to catch something great.

Also Read: How to Catch Trout Fishes At Night

How to Catch Tilapia on Rod and Reel

As a general rule, you should always carry a heavy rod when going fishing. However, Tilapia are an exception to this rule. You don’t need a heavy rod for them. A rod weighing strength between 10 and 12 pounds is usually best for them. Also, a fishing trip would not be complete without a fishing rod. So, choosing the right fishing rod is, therefore, a must.

Moreover, a thin reel is necessary to ensure that it helps catch fish. A thick reel is not suitable when fishing for Tilapia. Alternatively, you can cover a live bait with cheese if you prefer that. Tilapia will attract to the hook more easily. Bread will also work.

A tiny Tackle is also important for catching Tilapia fish. These fish can see well. Furthermore, they’re quite timid. Therefore, a small tackle will be easy to catch.

Let’s look into it more closely now

Choose a Location: The location is an important factor in catching Tilapia. These fish tend to be shy. They are easy to get alerted to if you get too close. The best place to catch them is along the shoreline.

Also, trolling on a slow boat can be useful. Be careful that you are not too close to the spawning area, or you will not be able to catch any fish at all.

Hooking the Lure: Due to the fact that you will be using a very small hook and a tiny tackle, ensure that you hook the lure in a manner that shows the hook. The lure will not get stuck if the hook is not exposed properly.

An artificial lure with a lip is also an option. Tilapias tend to be attracted to this lure. It’s quite effective at catching them. Always cast with accuracy and safety.

Hooks are best inserted right through the middle of lures. Thus, Tilapia wouldn’t be able to eat it.

Where to Cast: It is now time to cast out the lure for catching Tilapia after you have hooked on to it. You will get the best results if you cast near the shoreline where there are lots of rock structures and dead branches.

Rubber floats are also useful for locating your location. If that location doesn’t produce enough results after a few casts, move on to another.

How To Catch Tilapia on Beds

Silence is the key to catching tilapia on beds. Be careful not to spook the fish with your shadow. Place a small bait on the bottom and watch it sit for a few minutes. A tilapia is shy, but it will attack anything that gets too close to its bed.

Tilapia can be caught on beds only if you can locate them first. A tilapia bed in a pond, creek, or river looks like a sand crater. The beds range in size from 1-3 feet. They are usually surrounded by fish.

During the spawning season, tilapia are particularly protective of their beds. Flocks of these fish can spawn year-round at temperatures over 15°C.

Finding a tilapia bed and agitating them without scaring them is a very effective way to catch them.

But, don’t get too close to the tilapia bed once you’ve found it. It will scare them away. You won’t be able to catch any.

Go to the shore or stand in shallow water. Put the line in the direction of the tilapia bed while remaining undetected.

Also Read: How To Fish A Carolina Rig For Trout

Best Baits to Catch Tilapia Fish

Several kinds of food are eaten by tilapia. However, they tend to be herbivorous. This means that they eat vegetables more than meat. In addition to vegetables, even small aquatic plants are included in the tilapia diet.

Therefore, most anglers suggest corn as the best tilapia bait. Tilapia are also easy to catch using peas, bread balls, and earthworms.

Here are some of the best baits to catch Tilapia:

Corn

Many anglers use corn not only in order to catch tilapia, but also to attract other fish. Five different kinds of corn is generally used in fishing. But, there is more success with canned corn and frozen corn among these types.

Bread Balls

Bread balls can also be used to bait tilapia. However, some bread balls do not stay on the hook very well. Thus, this should only be used as a last resort if none of the other baits work.

Small, tight balls of bread are rolled to attract tilapia. It is also recommended to add catsup to make it tastier. You can order dough baits from online stores if you don’t feel up to rolling bread to make baits.

Peas

Tilapia bait can also be made from peas rather than corn. They are readily available at supermarkets. You can also purchase them online and have them delivered to your doorstep.

Green peas can also be used canned or shelled. Their effect on tilapia would be similar. Since frozen peas stay on hooks longer, they are more recommended.

Earthworms

The use of earthworms has also been claimed as a means of catching tilapia by some anglers. You can collect earthworms from your backyard easily.

It is best to make them look like small invertebrates in order to catch the tilapia’s attention. Online options are also great if you would rather buy some quickly.

Best Time to Catch Tilapia

In order to catch your target fish, you should fish during times when you know you will have the best chances.

Tilapia is best to fish during the peak season of its spawning period if you want to catch this delicacy.

The spawning of tilapia takes place when the water temperature drops below 60 degrees Fahrenheit or 15 degrees centigrade.

Thus, fishing for tilapia is usually best during the spring or fall. Tilapia is usually present all year round, however.

Therefore, it is vital that you head out there and start looking for them.

You need to figure out what works best for you. And, within no time at all, you’ll become a pro fisherman.

During these periods, make sure that your local area does not have any laws restricting fishing for tilapia.

Now that you know all the important stuff about catching Tilapia, here are some tips which will help you do so.

Find Them in Shallow Waters

Your fishing trip will be more successful if you know where to cast your spinning rod. Tilapias are usually attracted to shallow, vegetation-filled waters when they spawn. This allows them to avoid being eaten by predators.

The best place to find tilapia is in slow-moving waters found in the subtropical and southern areas. Tilapia are also present near banks. So, a slow trolling of the beach shoreline is also a good idea.

You may have fewer chances of succeeding if you dive deep into the water. So, the best areas for casting are those with a high concentration of sea structures.

Mark your location using the bobber float. It is always possible to move on to a different location if your current position does not produce after multiple castings.

Using The Best Bait

Generally, tilapias are herbivorous. Peas and corn are their main food sources. You can use bread balls if corn and peas are not available.

It may be a good idea to freeze bread balls if you are having trouble using your fishing hook with them. In that case, the bread balls would be hard enough to penetrate easily with a hook.

During spawning, tilapias become very territorial. You may increase your chances of landing the tilapia by taking advantage of the fish’s territorial instincts. Invertebrates and small fish are the primary targets of tilapia and will fight to defend its territory.

In varying fishing areas, tilapia diets may differ. You should take the time to study the fish’s preferences in the area where you plan to fish if you want to maximize your chances of landing the tilapia.

Then you won’t have to complain that you can’t catch fish because you will be offering what your target fish loves.

Hook the Bait Properly

The lures should be short. Using larger lures may make hook sets more difficult. For catching tilapia, small earthworm pieces are best to use on small hooks.

The tilapia fish is famous to take bait from anglers, without them landing the fish, which can be quite frustrating. You need to hook your bait properly to avoid this.

In order to learn how to catch tilapia, it is important to practice the hooking of various tilapia lures and baits. It is ideal to expose the hook tip of the lures and baits when hooking them.

It is important to hook your bait through the center when using bait such as worms and nightcrawlers. If tilapia tries to steal your lure, it is more likely to get hooked.

Right Posture While Fishing

Anglers generally hold their rods horizontally and vertically when fishing for tilapia. If you’re fishing for tilapia, this may not be the best method to catch it.

Generally speaking, experts who know how to catch tilapia recommend downward sweeps. The fishing is usually moving between 3:00 o’clock and 5:00 o’clock to achieve this.

The majority of the time while tilapia fishing is going to be either sitting or standing. When sitting, you can reduce fatigue by using a fishing chair. For standing, you must learn the correct posture. Exercising can help you relieve back pain that occurs after standing for long periods of time.

Also Read: Rigging Guide For Walleye (With Pictures)

Apply for a Fishing License

Public access to all fishing spots is not always available in the US and other parts of the world. Find out whether a fishing spot requires a fishing permit or license before you grab your fishing pole and head there.

Tilapia fishing in a license-required area without the license can lead to lawsuits if caught. There can be steep fines and penalties. As a result, the best course of action is always to obtain a license, if required.

Don’t Throw It Away

It is a good recommendation that you release game fish after landing them.

However, there is no such thing as game fish for tilapia. Instead, it is a good practice that you keep as many tilapias as you can catch and cook them.

It’s because Tilapias colonize easily as they have territorial instincts. It is a fact that they are destroying other fish species, causing ecosystem imbalances.

They destroy vegetation in the rivers and ponds where they live. So, in order to keep the number of tilapia in check, it is not good to release the fish after landing.

FAQS

How to catch tilapia in Florida?

It is often referred to as an “introduced” or “invasive” species in Florida as it is non-native to the state. Therefore, they are not considered endangered species.

You can go and catch them in your near beds or ponds where there is Shallow water and some vegetation.

How to catch blue tilapia?

Just like all other species of Tilapia, the Blue Tilapia are also herbivores. So, you can use the baits such as corn or peas to attract them. Be patient and make no use as they are easy to distract by any noise-causing in the surrounding.”

How to make dough bait for tilapia?

This recipe calls for 1/2 cup of granulated sugar, 1/4 pound of processed cheese, and 1/2 cup of cornmeal and flour. A bait made up of these ingredients forms quickly and holds firmly when attached to a hook. The bait will also stay fresh in your refrigerator for a while.

Final Words

Most anglers find that catching tilapia is challenging but fun. It is essential that you learn how to catch tilapia, where they usually spawn, and how to hook bait properly in order to catch them successfully.

We have reviewed some best-polarized sunglasses for sight fishing, that will definitely help you in catching tilapia.

When it comes to bait for tilapia, corn is the best choice, since this species is mostly herbivorous. Other options include bread balls, peas, and earthworms.

These are not so hard to catch. All you need is a good bait and some patience.

Are Bass Good To Eat? How To Cook & Enjoy These Fishes

Anglers love to catch bass. However, people who fish bass for sport or who wish to eat it might wonder if the bass is safe to eat. Bass is undoubtedly a tasty fish. You can use it to cook just about anything. But can you eat a bass?

can you eat bass

Fish are generally safe to eat. Nevertheless, you should still use caution when eating them. When eating bass, you should consume moderate amounts to avoid mercury poisoning.

Mercury poisoning is avoided by consuming only six or fewer servings per month. Here’s more info about it.

Can You Eat Bass

There are a variety of waters where bass live. The taste and smell of bass can be very unpleasant if the water is muddy and full of algae. Naturally, there are some recipes that contain so many spices that they mask the real taste. You might want to avoid bass from stagnant waters, though, if you like freshwater fish.

Bass caught in colder, more oxygenated water at colder times of the year can actually taste good, especially if they live in clean water. It is not uncommon for bass which is present in muddy waters to have a muddy taste. However, as much as you like freshwater fish, it probably won’t taste good.

Furthermore, it will be difficult to clean such fish. This is because the intestines can smell terrible. There are also differences between bass species, besides the water. The number of species varies. Smallmouth and largemouth bass are the most common. Various types, such as spotted, redeye, and striped, are also found.

Can you eat largemouth bass?

In a nutshell, yes. The largemouth bass is quite tasty. Nevertheless, as with any fish species, there is a preparation method that can guarantee you consume the best quality of bass.

So, is there a better-tasting fish? As for freshwater fish, there are certainly others that are more popular.

Is that to say that bass isn’t good to eat? Certainly not. Good bass is a great meal if you store it properly and cook well. There are a lot of them around.

What does largemouth bass taste like?

Have you ever wondered what bass tastes like? Or can you eat a bass? Well, its flavor depends upon where it comes from. The flavor of largemouth bass is mild and agreeable if you get it from a clean lake. The flesh of largemouth bass is tender and white. As it cooks, its texture becomes flaky.

Also, the taste of bass can be very bad if you get them from murky or unclean water. Bass meat tends to taste muddy during algal blooms in summer, for example. Because of this, eating largemouth bass in colder months is better.

In addition to an unpleasant and pungent odor from their body cavity, some people don’t like eating bass because they are gutted. However, you can remove the smell by thoroughly rinsing. The smell usually disappears after cooking.

Is it better to release largemouth bass, or to eat them?

There is remorse or pressure associated with keeping a bass, due to its popularity of it and local laws to prevent mass fishing. Are largemouth bass better released or should some be kept to eat? Or can you eat a bass?

If you want to fry some bass, it is fine to do so. You can do it as long as it’s within your region’s size and slot limits, and as long as it’s done moderately. Is that to say you should keep a cooler full of bass weighing ten pounds? Certainly not. But would it be okay to keep some smaller fish? Certainly.

According to wildlife managers, keeping bass is actually good for local fish populations if recreational harvest limits are followed. Consequently, this mentality of not keeping fish, which is prevalent among bass fishing communities, might be doing more harm than good.

When you don’t keep smaller, more aggressive fish, you are limiting food resources and affecting bigger fish. Although bass fishermen detest admitting it, sometimes the bass swallows the hook when hooked. These occurrences can be deadly. You shouldn’t throw back a dead bass. Keep it. Make good use of it. Make a nice meal out of it.

The reason is that they’re awesome. The following reasons help explain why bass fishing is very popular:

  1. These fish are incredible. Anglers adore them because they can grow very large very quickly and possess all the characteristics anglers cherish.
  2. There are a lot of them. All states except Alaska are home to largemouth bass and its subspecies.
  3. A wide range of techniques and methods can be used to catch largemouth bass.
  4. The bass fishing industry is big business. Approximately 11.5 billion dollars are generated annually by recreational fishing in the United States by anglers.
  5. There is a cult following for bass fishing. Fishing for largemouth bass has become extremely popular over the past three decades. It hasn’t slowed down since.

How to cook largemouth bass?

A delicious largemouth bass meal requires the right equipment and technique. Bass fish can be prepared in a number of ways. Depending on who you are serving, you should decide how to cook it. Consider easing into this with a heavily battered fish fry for someone reluctant to try this because they fear the taste of black bass.

Fish is a delectable fare that can be transformed into a delicious dish with a few herbs, butter, and lemon. Roasting the whole fish is an option for some people. However, others prefer to leave the skin on. Our recommendation is to use fillets with the skin removed. As a result, the end product will have the least amount of fishy flavor.

To cook your bass, you will need a stove, fireplace, or grill. Depending on the size of the fillet and the temperature, most methods take between 8 and 15 minutes. The process of filing the bass takes between three and ten minutes if you are doing it yourself. It depends on how fast you are.

All these recipes can be prepared in less than five minutes if you already have the filets.

Basic Pan Grilled Bass Recipe

Make a simple, pan-grilled version of bass to get your feet wet in the world of cooking. Simply follow the steps below:

  • To dry the fillet, use a paper towel on both sides.
  • Next, score the filet approximately half an inch deep in two or three places to prevent it from curling.
  • Fillets should be generously salted and peppered on both sides.
  • Over medium heat, melt two tablespoons of butter.
  • In a pan, place the fillet. Bake for 4 minutes.
  • Slice half of a lemon into the pan and flip the fillet.
  • Add another 4 minutes to the cooking time.
  • Let the meat rest for three minutes after removing it from the pan.
  • Depending on personal taste, this can be adapted in a number of ways.

Whole Bass Recipes

When cooking whole bass recipes, you don’t need to do the filleting beforehand. This is what we recommend:

  • The oven should be preheated to 400 degrees. The oven rack should be placed in the middle.
  • The bass should be rinsed, gutted, and scaled. It should then be patted dry with paper towels.
  • The bass should be scored every 3 to 4 inches 14.5 inches deep to avoid curling.
  • Serve the fish generously seasoned with salt and pepper, both inside and out.
  • Mix 2 tablespoons of fresh parsley, 2 teaspoons of fresh tarragon, 2 teaspoons of fresh thyme, 1 cup of olive oil, and the juice of 12 lemons.
  • Once this mixture has been applied to the fish, rub it all over, including the inside.
  • Garlic, lemon slices, and 14.5 cups of capers should be stuffed inside the bass cavity.
  • In a baking dish, place the fish.
  • At the bottom of the dish, place 1 cup of dry white wine and 4 tablespoons of butter.
  • If the bass weighs 2.5 pounds, bake it for 25 to 30 minutes in the oven.
  • Crispy skin indicates that the fish is done. Place the fish on a serving plate. Top with sauce.

It’s time to present everyone with your delicious fish. If you serve this with root vegetables, orzo, herbed couscous, or an herb-flavored couscous would be a great addition.

You can also switch up the ingredients to get a different flavor profile using the same method. The following ingredients will give your fish a delicious flair:

  • ½ teaspoon salt
  • ¼ cup chopped scallions
  • 1 ½ tablespoon coarsely chopped ginger
  • 1 tablespoon chopped lemongrass

Then combine 14 cups of soy sauce, 2 tablespoons of sesame oil, and 1/2 teaspoons of sugar. Place in an ovenproof dish. Heat for about 25 minutes. You’ll have an amazing meal. You can serve it with rice or green beans to complete the meal.

Can You Eat Freshwater Bass Raw?

You can enjoy raw fish quite a bit. It is possible to eat smoked salmon, trout, and similar species without undergoing thermal processing. However, can you eat raw bass? Yes, there are many freshwater fish species you can eat raw, including bass.

However, this is true only if the fish are caught in clean waters. Raw fish can contain bacteria and parasites, which can make it unsafe to eat. Thus, if you’re unsure if raw bass will be safe for you to eat, it might be best to avoid it.

Keep in mind that marinating or smoking only enhances the flavor. Unfortunately, it does nothing to eliminate parasites. Sushi and other dishes containing raw fish should be kept below freezing so they won’t spoil. Otherwise, they could spoil. Therefore, you are responsible for making the final decision. Also, very young children and chronically ill people should not eat raw fish.

Cooking Freshwater Bass

You do not have to worry about bass fishing in clean waters. Because you can cook freshwater bass in many different ways. You can cook bass the same way you cook other kinds of fish.

Bass can be prepared in a variety of ways, including frying, broiling, baking, etc. Fish fillets can even be made from it.

Is your freshwater bass ready to be enjoyed? Here are a few tips for cooking it:

Baking Bass

  1. Turn the oven on to 350°F.
  2. Place it on a baking dish and spray it with non-stick cooking spray. Season with salt and pepper.
  3. Prepare your baking dish by putting the bass inside.
  4. Add some lemon juice.
  5. Bake the fish at 160 degrees Fahrenheit for 30 minutes.

Pan Frying Bass

  1. Heat a skillet over medium heat with some olive oil.
  2. Place the fish in the pan.
  3. Season the fish with herbs and other spices of your choice.
  4. At this point, you can cook it for 5 to 7 minutes.

Broiling Bass

Broiling a bass dish is another way to prepare it.

  1. Turn on the broiler.
  2. Spray a non-stick spray on the broiler.
  3. Use your favorite spices and herbs to season the fish.
  4. Arrange the fish on the rack.
  5. Put it under the broiler for five minutes.

The first thing you need to do when you catch bass is to clean it immediately. Avoid overcooking the fish. When it comes to removing the skin,  you should do it carefully.

It may not be to everyone’s taste, but there are those who enjoy the taste of bass. Ultimately, everyone’s tastes differ. But what’s essential is that when preparing the fish, you take into consideration both the quality of the taste and the health.

Bass can be prepared in a variety of ways and using different techniques. Even the Internet can be used to find recipes. However, you need to be careful when cooking and eating it. As delicious as it may be to eat bass, there are health risks associated with it, as there are pollutants that could harm you. So, you should be cautious when you eat such fish.

Can Pregnant Women Eat Bass?

When it comes to eating bass while pregnant, there are methods to avoid mercury poisoning. Consumption of bass should not exceed six 6-ounce servings per month. However, this recommendation only applies to bass.

You should reduce your intake of bass if you consume other types of fish as well. Mercury levels in the bass are higher than those in other fish. In other words, when you’re pregnant, you shouldn’t consume more than 18 ounces. As larger fish consume smaller fish that have been exposed to mercury, they absorb the toxic substance. Generally speaking, the bigger the fish, the higher the mercury levels.

Listeria is also a concern for many pregnant women. Pregnant women are at higher risk for this infection. To prevent listeriosis from developing, follow all food preparation suggestions. No matter how resilient you feel, listeria can adversely affect the fetus.

Keeping bass filets free of bacteria requires proper storage if you decide to keep them. First, kill the fish, then rinse it thoroughly in clean water. Place the fish on a bed of ice and wrap it in plastic wrap.

FAQS

Why shouldn’t eat a bass?

Can you eat a bass? Well, there is nothing wrong with eating bass as long as you are eating it within a limit.

Also, people with some health conditions can avoid eating bass as a precaution. Because it generally contains a lot of mercury and other bacteria. So, you should cook it well otherwise you will get sick. So, if you are not confident about the quality of the bass which you are eating then you can probably avoid it.

What is the Best Tasting Bass? Largemouth vs. Smallmouth!

It is possible to eat largemouth bass if it is from clean water. Cooking the fish will produce white and tender meat. The taste is pleasant and mild. There are a number of ways to prepare this fish. There is one to suit almost any taste. However, largemouth bass has a stronger, fishier taste and smell. Many people find them unpleasant.

Smallmouth bass has a taste that is a bit different from the largemouth bass. Largemouth bass has a muddy taste, whereas smallmouth bass does not. Many people prefer smallmouth bass for this reason.

They are less fishy and taste better. If you prefer not to prepare your fish with a lot of spices then this is the option for you. It is suitable to consume both, however. It’s all up to you and your taste.

What Size Bass Should You Eat?

About 10-14 inches is the ideal size for largemouth bass consumption. The maximum size should not exceed 15 inches. The meat of young bass is tender and has a better flavor, as with most fish species. Over time, older ones become tougher, accumulating more toxins.

Additionally, cooking the smaller ones is easier. Cooking a big fish usually leaves a portion of meat uncooked.

What are the Health Benefits of Eating a Bass?

The health benefits of eating fish are many. The omega-3 fatty acids found in fish, including bass, are very healthy for the body. However, some fish have a higher concentration than others.

Additionally, fish contains nutrients such as protein that can benefit your health. Several fish species are also great for weight loss. Bass is also a fish that has manganese, phosphorus, and vitamin B12.

As a result, cholesterol levels are low and it helps in reducing high blood pressure, etc. Therefore, eating healthy fish also reduces coronary disease risk. However, even if food is healthy, you shouldn’t consume it every day. Try eating different foods every day. Make sure you eat fish a maximum of twice a week, whether it is bass or other fish.

Make sure the fish you consume comes from clean waters so you don’t digest any toxins. Mercury is present in some inland waters. So, Avoid fish that come from those waters.

Can you eat smallmouth bass?

Yes, You can eat smallmouth bass. But, again the only requirement is if it is from the fresh waters. And most people actually prefer eating smallmouth bass over largemouth bass.

Because the smaller one contains less mercury. And is tastier to eat as well.

Can you eat striped bass?

The Atlantic coastline offers some of the best fishing in the world for striped bass. They are in fact the best and most tasty among the bass family. The meat of the striped bass is very nutritious and flavourful. So, you can definitely eat striped bass.

Can you eat peacock bass?

Yes, it is fine to eat peacock bass if you are fishing in freshwater which is not dirty. The quality of their meat is excellent. They have white, sweet flesh when cooked. Its taste is similar to snapper or grouper since it is very low in oil. It is also not overly boney.

Can you eat rock bass?

Yes, there is rock bass that you can eat. The fish are delicious if you prepare them properly. However, compared to other bass types, rock bass has the obvious disadvantage of lacking meat. There is a lot of meat in the belly of an adult largemouth or smallmouth bass.

Rock bass, however, is not as meaty as other bass types. Therefore, you can only eat the leftovers near the tail of the rock bass.

Can you eat bass from a lake?

It completely depends on which lake are you talking about. You can definitely eat bass from a lake if you think the lake water is completely fresh and not polluted.

Can you eat white bass?

Yes, White Bass is fine to eat. A milder taste is achievable by removing the parts of white bass that have tough parts.

The fish makes an excellent fish fry and is a great food fish. However, those with fishy taste sensitivity may not enjoy it.

Can you eat sea bass skin?

Sea bass skin is safe to eat. It is actually beneficial to keep the skin on when cooking so that the flesh does not rip or detach. When the skin is nice and crispy, it will be more enjoyable to eat. To achieve this crisp texture, frying in oil is best.

Can you eat bass from a pond?

Well, there are different types of ponds. In the present day, there are ponds that are specifically designed and constructed for the purpose of harvesting fish. So,  of course, you can eat bass from that pond.

But, eating bass from other natural ponds can be unhealthy because those ponds have stagnant water and are not under anyone’s maintenance.

Can you eat sea bass raw?

Raw fish may make you sick, so you shouldn’t eat some kinds of fish raw. And sea bass is one of them.

It is because of the fact that these fishes generally contain high mercury content. So, it’s better to nicely cook and fry them before eating.

Final Words

So, now you know whether can you eat bass or not? Well, human intestines can digest almost any metal. So, eating fish is not a big concern.

However, there are many fishes that live in dirty and polluted water. So, eating them can be hazardous as their body contains a lot of toxic elements. Therefore, you should always enquire about the whole history of a fish-like bass before consuming it. You should take note of its origin waters.

And, if you find that it is from a body of water that may be polluted then you should definitely not consume that.

Also Reads:

  1. How To Fish A Carolina Rig For Trout
  2. A Complete Guide To Lindy Rig Fishing
  3. Rigging Guide For Walleye (With Pictures)

Baitcaster Gear Ratios Explained With Chart

Gear ratios can be confusing if you’re a beginner to fishing with a baitcaster, as there are several gearing ratios for different purposes. All gear ratios provide different speeds and power, and it all depends on what you’re catching and what type of lure you’re using.

Baitcaster Gear Ratios

Baitcasting Gear Ratio Meaning

Gear ratios determine the spool spins speed. Suppose you have a 7.5:1 gear ratio; this means that the spool will rotate 7.5 times for one turn of the handle. It helps to think of them as gears on a bicycle; the higher your gear ratio, the faster the spool will turn for every single turn of the handle.

There are various reels such as spin cast, spinning reels, and baitcasting reels. Generally, the gear ratios in baitcasting reels range from 5.5:1 up to 9.3:1, and they have higher gear ratios than spinning reels because they are instrumental in the high-speed retrieval of the lure or fish.

Baitcaster Gear Ratio Chart

We compiled a chart for the various gear ratios available in baitcasting reels. There are three ratio types: low, medium, and high. All three of these gear ratios are helpful in different conditions.

SpeedGear RatioRetrieval Speed
Low4.1:1 to 6.6:123” to 27”
Medium6.7:1 to 7.9:128” to 33”
High8.1:1 to 9.3:134” to 40”

Application of the Different Baitcasting Gear Ratios

Low gear ratio: 4.1:1 to 6.6:1

Low gear ratios of around 4.1:1 work better for larger fish and when you’re fishing with deep crankbaits, swimbaits, and spinnerbaits. The lower ratio delivers much larger torque from the handle to the spool, providing more power and allowing the fishermen to crank faster when fighting with a large and powerful fish.

However, if the fish starts swimming towards the boat, you have to put more effort into spinning the handle in an attempt to keep the line taut. Many saltwater fishing reels are set to this ratio for that reason.

Medium gear ratio: 6.7:1 to 7.9:1

Most baitcasting reels are set to this gear ratio as they are the most versatile and functional for various tactics. They are also very beginner-friendly as they work for fish that require live bait and work well with spinnerbaits, chatter baits, and shallow diving crankbaits.

These reels are fast enough to remove the slack, keep the line taut, and provide torque and power for some heavier and stronger fishes.

A ratio of 6.7:1 to 7.9:1 will most likely be the best overall gear ratio for baitcaster reels as it can be used for almost all types and tactics of fishing.

High-speed gear ratio: 8.1:1 to 9.3:1

High-speed gear ratios can go up to 10.1:1, called ultra-high-speed reels. These are useful when you need to quickly pick up slack from the reel when you feel a bite.

High-speed reels are helpful for fishing bass and schooling fishes that might or might not be close to cover, and they also aid in long casts and quick retrieval of the line.

These reels are also top-rated in fishing games where you have to pull the fish out of the water and onto the boat as fast as possible, and they also allow you to cast your line multiple times.

If you’re jigging or flipping from a drifting boat, you don’t get a lot of chances and can only cast your line once or twice in a particular spot; you want to be able to retrieve the line as quickly as possible so you can get another chance at the same place.

Furthermore, when fishing for bass, which is usually close to cover, like underwater trees, lily pads, and corals, the fish can go into hiding when you snag it on the hook, so a high-speed reel allows you to reel the fish away from that area much more quickly.

What is a good gear ratio for a baitcaster?

The answer to this question depends on what type of fish you’re catching and the lure you’re using to catch the fish. Overall a medium-speed reel with a gear ratio between 6.7:1 to 7.9:1 is the best, as these reels can adapt to a lot of circumstances and can be used to catch a wide variety of fishes.

Depending on the type of fish you’re catching, you should choose the appropriate gear ratios, as reeling in a large, powerful fish with a high gear ratio can be extremely hard and require a lot of strength to spin the handle.

Buying Guide

We know choosing a baitcasting reel can be confusing the first time; usually, bait casters are used by pros as they take some time to master properly, but they allow for highly accurate casting.

Here are a few things you should keep in mind before making a buying decision.

Gear ratio

This is by far the most important thing as you need to find the correct gear ratio as it affects the speed at which you can retrieve your lure.

Suppose you’re hoping to catch big and powerful fish. You should go for reels with low gear ratios of 4.1:1 to 6.6:1 as they allow for better torque delivery to the spool from the handle because you can spin the handle much more quickly than in reels with higher gear ratios.

On the other hand, while fishing for fish like bass, most anglers prefer a gear ratio between 6.7:1 to 9.3:1 since bass are found close to natural covers in which they can hide, and your line can get tangled up. Reels with higher ratios allow you to haul the fish up to the boat much faster, ensuring they don’t get to find cover.

Size of the spool

Keep in mind that larger fish need more giant spools, so if you’re looking to catch a big and powerful fish, you need to get a heavier line that can fit inside the larger spool with ease. Furthermore, as larger fish tend to make runs, make sure you have some extra line on hand.

Comfort

Comfort should play a significant role in choosing the proper reel as fishing is a patient game, and you might be at it for hours. So, choosing a reel that feels comfortable in your hands is very important. Before buying the particular reel, test everything you can, the grip, buttons, release handles, tensioners, and other features.

FAQ

What is a baitcaster reel?

A baitcaster reel usually sits on top of the fishing rod, and the spool is parallel to the rod; the line from the baitcaster also runs along the rod. Baitcaster reels are said to be for advanced users because the spool moves along with the line when it is cast.

Hence, it requires an experienced angler to handle it properly. Otherwise, the spool might move faster than your line, and the line ends up in a mess known as backlash or a bird’s nest. This can be reduced over time with appropriate practice and time.

How to use a baitcaster reel?

A baitcaster reel is useful for crowded areas or where the fish are schooling; it can also be used in an offshore fishing reel depending on its strength.

The dominant hand is used to cast the line and controls the reel, so you have to switch between them. Advanced anglers use their thumbs to stop and control the line to prevent backlash.

What is a spincaster reel?

Spincaster reels are the most common and the cheapest options available in the market. They are suitable for beginners as they have a single button to toggle between free and locked spool.

However, it is covered with a plastic cover, which means that if the line tangles, it will go unnoticed until it becomes a huge mess.

Furthermore, water and debris can seep into the casing while will shorten the lifespan of the reel, and it can’t last for multiple seasons as it’s not as durable.

What is a spinning reel?

Spinning reels are famous among anglers worldwide, and beginners can also use them.

The reel is mounted at the bottom of the rod, which provides stability and balance to the rod, and the drag adjustment switch is at the top of the rod.

Spinning reels allow for more flexibility as you can control the metal bail with your index finger; this prevents unspooling before the line is cast.

Also Read: Baitcasting vs Spinning Reel: Which One is Better?

What are lures?

Lures are an alternative to live baits; they are artificial baits made to mimic the live ones. They come in various shapes, sizes, and colors. There are multiple types of lures depending on the kind of fish, the water temperature, size, and the depth at which it usually lives.

Conclusion

We hope this article helped you understand how baitcasting gear ratios work and choose the best one for your specific needs. As always, stay safe and happy fishing.

Do Trout Bite At Night (Detailed Guide)

If you enjoy fishing, you have probably wondered what it’s like to fish at night, especially when it comes to trout. Some fishermen who have been fishing for a long time and have accumulated knowledge in the sport go trout fishing at night to take advantage of the darkness and to observe how trout behavior changes from day to night, while others return home by the evening.

Night Fishing For Trout

While night fishing is a different sort of experience, it is also one of the finest methods to catch trout, albeit it is not as simple as it appears. With trout fishing at night comes a lot of challenges which usually do not come when you are fishing during the day.

Trout Fishing at Night: Do They Bite?

If you are planning to go night fishing for trout, you might be wondering do trout bite at night or not. The benefit of trout fishing at night is that you will almost certainly receive a better bite than fishermen who fish during the day.

This is essentially true when it comes to brown trout since they are attentive throughout the day as well, but their activity is more in the dark than during the day, ensuring a huge catch.

Due to the high-pressure weather in the summer, you will witness trout fish being more active at night to feed themselves than during the day.

Another advantage of fishing for trout at night is that you have a far better chance of finding and catching a large trout than you would during the day. The larger trouts are more active in the dark, which means at night, giving you the best chance of catching a prize.

Do Trout See At Night?

One of the most important animals that rely greatly on vision is the trout. They don’t have night vision at night, but it doesn’t hinder them from detecting object motions in the water and vibrations.

Their lateral line organ enables them to do so, and as a result, they are able to detect vibrations and other disturbances in the water. These trout fish have a lateral line organ that allows them to focus on their prey more effectively.

Even if the trout cannot see your lure or bait, it will be able to sense the prey thanks to this organ.

Best Lures For Trout Fishing At Night

Even when you go for night fishing for trout in lakes, the most important thing to remember is that trout fish is more sensitive to vibrations, so in order to make sure those vibrations reach them, you need fishing lures that can create those vibrations and the sounds that will attract trout fishes.

The best type of lure that you can choose in this matter is a topwater lure and spinners.

Topwater Lure: You may use a topwater lure to catch trout at night, especially if you’re a bass angler since you’ll notice the difference when the day turns to night.

When it comes to fishing for trout during the day, they aren’t always simple to come by, and they are not always plentiful, but the situation changes dramatically when it comes to luring fishing at night. As a result, you may use even bigger lures if necessary to catch a large trout fish.

Make sure you use a topwater lure that attracts them in the dark, in addition to utilizing a topwater lure. Choose hues like white or yellow that are clearly visible in the dark to entice them.

You should give them enough time to key in your lure so that it is precisely keyed. You should slow down your retrieve pace at night for this purpose so that it works to your advantage and you can capture a trophy-size fish.

But what can happen is that because trout can’t see properly at night owing to the complete darkness, you can catch some short strikes throughout the night.

However, you must pause the lure in the same location after one or two strikes to ensure that the same fish still keys in your bait. You’ll undoubtedly have a catch if you are a little patient when it comes to giving trout time to key.

Spinning Lure: One of the primary advantages of employing spinners as a nighttime lure for trout fishing is that they have whirling blades that create powerful vibrations in the water, which attract the trout.

Choose a spinner lure with silver or white blades from the many spinner lure alternatives available since those are the colors that are visible to trout fish at night and attract them to it.

Best Bait For Trout Fishing At Night

If you want to catch trout at night, you will definitely need bait, and the ideal form of bait for this is a live bait since it moves about more in the water and attracts the trout’s attention quickly. You must comprehend the significance of live bait in this situation.

Trouts rely significantly on their lateral line organ to locate food in the dark, and when we utilize live bait, the way it moves actively makes the trout want to have it and bite it.

Furthermore, if you want to go rainbow trout fishing at night, you can easily catch them with power bait or worms because they have a keen sense of smell, making them much simpler to catch at night.

Power-bait: When utilizing a power bait, the first thing you need to consider is the color you want to use to attract the trout. Try and use some bright colors like yellow and chartreuse which boosts your chances when you go for rainbow or speckled trout fishing at night.

Also, try putting some strong fragrances on top of your bait to attract the trout faster. You may use the scents of garlic and shrimp, among other things, for this. At night, choosing a scent is critical since it is the sole sense that allows trout to locate their bait readily in water.

Worms: It’s better to use live baits when trout fishing at night with worms since you may hook them from one end and leave them moving from the other. The trout will be attracted to the worm’s movement because it utilizes its lateral line organ to identify prey. As a result, the actively moving live worm will rapidly capture its interest.

You may absolutely wait for the trout to bite after it detects the movement. If you’re fishing with a large worm, you may utilize a rig for trout fishing that comes with two hooks and a hook on either end of the worm. You may use scented oils on worms to help trout feel more attracted to them, much like you can use smells on power baits.

When Is Trout Night Fishing Best?

When you plan to go fishing for trout, we recommend you to go on a dark night with no moonlight as trout tend to be more active and easily attractive on darker nights than normal moonlight nights.

These dark evenings provide you the advantage of capturing trout since trout do not utilize their vision or senses to identify food or prey on these dark nights.

Instead, it shifts its concentration from vision to the lateral line organ, which means it concentrates more on the vibrations and sounds created in the water to detect food. Even when there is no light, their lateral line organ sensing aids them in finding food.

So the best way to figure out a perfect day to catch trout, is that you can track the moon cycle, which will let you know when trout will be active more, and that’s when you can fish trout during the night with least or no amount of moonlight.

Surprisingly, when it comes to feeding, trout behavior at night is completely different than it is during the day. Large lures may cause trout to jump and strike more than they do during the day.

Trout are more likely to migrate into the shallow region of the water at night to look for and consume worms, minnows, and insects than they do during the day, as they become less bashful and more eager to meet their demands. This knowledge makes it simpler for you to win a trout fish at night.

Also Read: How To Setup A Carolina Rig For Trout Fishing

Tips For Trout Fishing At Night

As you know by now that fishing at night is a whole different challenge than fishing in the day. Thus, to make it easier for you, we have listed down some tips and tricks that you may follow:

  • Headlamp usage: Trout are particularly active in the darkest of nights, especially when there is no moonlight, as we discussed previously. You won’t be able to see anything as a result.

We advocate using a headlamp for the purpose of having some light around you so that you can see better, and also because using a regular torch would have filled your hands, interrupting your fishing process, therefore the best alternative is to use a headlamp that will not disrupt your fishing process.

Also if you are buying a headlamp, make sure the bulb to be red in color as trout fish does not get scared by red light but if the bulb is yellow in color, they might.

  • Look for the perfect fishing spot: To improve your fishing, you’ll need a thorough overview of the area where you’ll most likely catch more trout. That can only happen during the daytime, as you won’t be able to see anything in the dark.

You’ll be able to navigate and cast your lures or bait more effectively if you have a strong understanding of the area.

So, the day before you plan a night, familiarise yourself with the region, point out the locations, and prepare a list of all the landmarks where you believe your fishing will provide results.

  • Attaching a stinger hook to lure: Trout strike more frequently during the day than at night, making them more active. Thus, if you want to make the most of the night and avoid trout strikes, you may add a stinger hook to your power bait or spinner lure.
  • Wearing a lifejacket for safety: The first thing that springs to mind when thinking about fishing for trout at night in the water with a boat or kayak is safety.

If anything occurs while you’re fishing and you fall into the water, you’ll be able to float in the water and get back into the boat by wearing a lifejacket.

  • Waterproof bag for valuables: Just as we discussed in the previous point, if you must enter the water, you must wear a lifejacket, but this is insufficient because a lifejacket will not save your smartwatch or smartphone.

As a result, once you are in your boat or kayak, place all of your valuables in a waterproof bag so they don’t get wet.

  • Fish deep holes: During the night, trout, particularly brown trout, look for food and prey in deeper, shallower holes in the water or feed on the water’s surface. So, when you’re fishing, try to stay on the surface as much as possible while also looking for deeper holes that are shallow enough.

Also, if you come across water that flows through a deep or shallow hole, there’s where you’ll locate trout, so keep an eye out for that.

  • Fish slow: Even though you know that fishing at night has an advantage over overfishing during the day, you still need to be patient when drawing up the key since trout may require some time to sense the prey, meander about it, and bite it completely.

Once you get a feeling that the fish are keyed, it is time to lift the key up. So, in order to catch trout at night, you must both fish slowly and have patience.

Advantages Of Fishing At Night

Temperature: When it comes to summer fishing, the best time to go is late at night or late in the evening. Because trout fish hide in deep holes during the day in the summer because of the warmth of the sun rays that reach the water levels, the odds of catching one during the day are quite slim.

However, when the sun sets and the water begins to cool, trout prefer to congregate in shallower portions of the water to take advantage of the colder temperatures. This makes trout fishing easier and more pleasant for you.

Because of the high temperature, it will be difficult for you to wait patiently and capture a fish throughout the day. As a result, fishing at night benefits both you and the fish!

Noise: Another benefit is that you will notice more water boats or kayaks in the water during the day, which will fill the water body with the noise of the motor, scaring away the fishes quickly, which means you won’t be able to find any fish, much alone trout, during the day.

Thus, many fish may be found at night, when everything is peaceful, and fishing at night allows you to navigate more freely.

Activeness: As previously said, trout fishing is easier at night than during the day since the fish are more active at that time. The trout can detect movement and vibrations far more easily at night than they do during the day since there is less noise and the water body is much calmer.

As a result, if you are fishing for trout at night, you will almost likely catch a huge one because when they see a meal in front of them, they tend to eat over it since their feeding mode is much more active.

Frequently Asked Questions (FAQS)

Do rainbow trout bite at night?

The answer to this question is unequivocal yes. Rainbow trout are less active during the day because they prefer to stay in deeper holes, especially when it is sunny, but their behavior changes at night.

As a result, you may receive a better bite than you would during the day because rainbow trout, as well as other species such as brown trout, have more active lateral line organ sensors, allowing them to detect food more rapidly.

Is trout fishing good at night?

When it comes to getting trout fish, the greatest time to do it is at night. In addition, the best time to go trout fishing is one hour before sunrise and an hour after sunset.

This shift in living situations causes the trout to be more active at night than during the day. Trout fish are more active at night and may key in on your lure or bait more readily, as they move to feed mode, whereas they are less active during the day.

Yes, night fishing is lawful in the United States, and there are no national rules regarding night fishing hours. However, other states have their own laws, resulting in some states having strict nighttime fishing restrictions and others having no restrictions at all, allowing you to fish whenever you wish.

All of this is contingent on the sort of water body you intend to fish. For example, there are no limitations on fishing at night in Alabama, so citizens can fish whenever and at whatever time they wish. There is, however, a water safety rule if you plan on fishing by boat.

In Colorado, all of the state’s waterways are open for fishing at any time, as long as all appropriate measures are taken. Only a few limits are placed on a specific water body, thus emergency fish salvage is only permitted during daylight hours and not at night.

In places like Delaware, on the other hand, you can’t capture rainbow trout, brown trout, or any hybrid species in any of the state’s rivers, especially one hour after sunset and one hour before sunrise. As a result, you may go trout fishing during the day and spend your time catching trout.

How to catch stocked rainbow trout at night?

Because they have been raised in a controlled environment, stocked rainbow trout do not usually bite at night like other trout fish. Even after developing the impulses, they are unable to fully commit to biting the prey at night.

But, if you still want to attract them, you should know that stocked trouts are normally eight to twelve inches long, and after being put in the water, they tend to consume mostly insects and other bugs because this is their only source of food.

So, if you want to catch a stocked rainbow trout at night, you will almost certainly need to bait or entice it with worms. Worms can attract stocked rainbow trout and feast on them as they wander about in the water.

Do trout sleep at night?

Everyone, whether they are humans or fish, requires relaxation. As a result, trout sleep, but not in the same way that people do.

When they want to sleep, they fall into a trance rather than entirely shutting down as humans do. They may even continue to swim while taking a break in the river.

Conclusion

Nighttime fishing, according to us, is a good technique to catch trout since trout bite better at night than during the day, making it more likely for you to capture one. Trout fishing at night is an incredible experience that you should do at least once in your life if you enjoy fishing as a pastime.

Nighttime fishing, on the other hand, needs more preparation than daylight fishing. In such a case, make sure you have all of the appropriate equipment, including light, to make things simpler for you while you fish.

If this is your first time night fishing, make sure you do your research on what to pack. Also, if you want to fish at night, check your state’s prohibitions or rules.

How to Spool Braided Line on a Spinning Reel – Without Line Twists or Loops

You’re considering getting a braided line for your spinning reel, but you’re not sure where to start or whether it’ll be a good investment? A braided line on a spinning reel, on the other hand, has its benefits.

Braided Line On Spinning Reel

It has several benefits, one of which is that it is far more durable than fluorocarbon or monofilament. You’ll wonder why. That’s because the braided lines may last up to five times longer than fluorocarbon or monofilament, although being somewhat more expensive.

In addition, the braided line is more sensitive than others, which is still another advantage. This makes the rod responsive without the need for stretching. Braided line also casts better on spinning reels.

Putting Braided Line On A Spinning Reel

The tools you need to put a braided line on the spinning reel are as follows:

  • One rod for the reel
  • One spinning reel
  • Any thick cloth
  • Screwdriver
  • Scissors
  • Electrical tape
  • Any two chairs
  • Spool of line
  • Someone to help you out

Step 1: The first step is to put the reel’s rod together and try to line up the eyes. After that, you may place the spinning reel into the reel’s seat and secure it by tightly tightening the reel.

Now that you’ve secured the real, turn it clockwise so that you start spooling braided line on a spinning reel. It should wind clockwise and both spools travel in the same direction, which is right.

To prevent the line from twisting, line the spool onto the reel as tightly as possible so that it winds in the same direction.

Step 2: The line must then be attached. Now you must untangle the braided line from the spool. Only take off 15 feet of line from the spool since you don’t want it to become tangled up.

Thread the line through the rod and from the top of the reel to the bottom. When tying a knot, the bail arm should be open and given space because if it isn’t, you’ll have to repeat everything, which means cutting the line entirely, which you don’t want to do.

The braid will then be tied to the spool with a firm grip to prevent it from slipping. You may also tape the spool with electrical tape to keep the braid from sliding if it isn’t quite ready for braiding.

Step 3: Set up two seats with the aid of another person with about 20 feet of space between them. Pass the spool of line to the next person in line. Insert the screwdriver into the hole in the center of the spool. The spool will revolve around the screwdriver once you’ve done that.

Request that your companion holds the spool with a cloth in one hand while holding the screwdriver in the other. This is done to ensure that the line on the reel is sufficiently taut.

The fabric may become heated in the midst of the method, so you may want to take a break and then resume, but with the same pressure, since if the pressure is uneven, you will have to repeat all of the procedures, which you do not want to do.

Step 4: Winding the fishing line for the spinning reel is the most critical element of the operation. To do so, connect the line to the spool as neatly as possible while using minimum pressure. Also, attempt to prevent any line bites or overwinds that may occur while doing this.

Now, take a seat, pick up the rod, and reel while your companion holds the screwdriver with the spool. The drag should then be tightened to ensure that the reel is properly fixed. Allow the rod to rise and flex a bit as you begin to wind the line.

Wind the reel at a medium pace while inspecting it for cleanliness and tightness, or enlist the assistance of another person to tighten or loosen the spool for you. Stopping to push on the reel is required on a regular basis.

Step 5: Filling the reel is the fifth step. Continue winding like you were told above until your reel is filled, but make sure there isn’t too much line involved because this may easily lead to unspooling.

When you observe a lip between the fishing reel and the spool top, that’s when you should come to a halt.

Step 6: Press the line to see whether it’s hard. Though it’s not too hard, go back to step 4, even if it will take longer this time. If you’re a newbie, be extra cautious the first time you learn how to put a braided line on a spinning reel.

Once the reel is full, you may attach your leader, which should be made of fluorocarbon lines and tied with an FG knot.

Also Read: Common Spinning Reel Problems (And How To Fix Them)

Frequently Asked Questions

Can You Use Braided Line On A Spinning Reel?

The braided line may absolutely be used on a spinning reel. However, there is one thing you must keep in mind: avoiding spool slippage.

This can be accomplished by spooling a monofilament backing or, for that matter, a tape backing on the spool arbor to prevent spool slippage.

How Much Braided Line To Put On A Spinning Reel?

The simple answer is that you may use as much braided line as your reel size will allow. That doesn’t imply you should overfill the spool beyond its real capacity since this might cause it to bounce out of line and absorb water, as well as take up space.

Fill it with as much as you can while staying below the tip. The normal fill level is now roughly 1/6 below the spool’s lip. So, how much line should I put in now? The ideal method is to work with a backing along the braided line.

On your reel, you should put 50 to 100 yards of monofilament backing line, depending on the size of your reel and the line capacity available.

Also, you will want to leave some room for the spool, which has around 100 yards of braid on top of the backing, requiring you to load the reel to within 1/8 inch of the spool rim.

Is Braided Line Good For Spinning Reels?

When it comes to spinning reels with braided lines, it is unquestionably better than monofilament or any other line since it offers several advantages. One of the benefits of braided line is that it has practically no stretch, providing you greater sensitivity to feel and know what is going on with the lure or bait in the water, as well as whether a fish is eating it.

Another benefit of braid for the spinning reel is that it is less likely to be twisted than other lines since it has no memory. It also does not have a huge diameter, which allows you to spool stronger lines as needed.

Unlike monofilament, braided lines continue to perform effectively for a long time before needing to be replaced.

How To Spool Braided Line On A Spinning Reel?

To spool the spinning reel with a braided line, place a small coating of backing on the spool first. You may use a mono or fluoro line for this. Wrap your regular fishing line around the spool until it is completely covered.

After that, connect the braided line to the backing line. You may use a double uni knot or another knot for this, but it should be quite thin.

Then, spool the braided line and fill the spool until there is 1/8 space remaining. Once you are done with this, tie a fluorocarbon line leader of at least 6 to 8 feet to your braided line.

What Colour Braided Fishing Line On Spinning Reel Is The Best?

There are many other colors of braided line available, but we recommend going with a ghost or low vis green since these are two of the few braided line colors that are seen more and better by fish.

Furthermore, if you’re fishing in dark water, it won’t matter what color braided line you choose because visibility will be poor, even for the fish.

However, if you are fishing in clear water, ghost or green are the best choices. Green because you’ll be able to see your line clearly if it becomes tangled, which won’t be simple if you use a ghost color braided line.

Why Choose Braided Line On Spinning Reel: Conclusion

If you have read this far, you’ve probably figured out that braided line outperforms all other types of line on spinning reels.

The rationale for using a braided line on a spinning reel is that it has a tiny diameter, casts rapidly, and has no stretch, making it sensitive. It is also highly sturdy and robust, and will not let you down in the long run.

Furthermore, it has no memory, ensuring that it does not become twisted quickly. With all of these features and specifications, it is clear that a braided line on a spinning reel is a terrific pick and a great piece of equipment!

How To Fish A Carolina Rig For Trout (Detailed Guide)

You must have the correct rig in your hands if you want to catch a trout effectively. As trout prefer to stay on the bottom, the Carolina rig for trout is ideal.

The Carolina rig is the easiest to understand and put up for someone who is new to fishing and wants to get the feel of it.

Carolina Rig For Trout Fishing

Is Carolina Rig For Trout Useful?

Because trout prefer to stay at the bottom of the water column, employing a Carolina rig to distribute the bait for trout is a wise option.

However, if the trout are very far above the bottom, or if the water level is quite high, the Carolina rig may not be the best choice. What you can do is use a bobber rig to make baiting easier.

You must now ensure that your Carolina rig works in tandem with other rigs like floating bates or lures for it to be effective. Why?

You see, when trout are towards the bottom of a body of water, they nearly never take food from the bottom, preferring instead to eat food that is widely distributed in the water near the bottom.

It will become increasingly difficult for you to capture a trout as a consequence of this, so you must work intelligently!

Should You Consider Carolina Rig For Trout Fishing?

As previously said, trout always favor food that is well suspended in the water above the bottom level when it comes to feeding. So, if your Carolina rig for trout fishing performs properly, it will easily reach the level where trout generally hang out, which is just over the water’s bottom.

One of the main advantages of using a Carolina rig for trout fishing is that it can be used in two different ways. To begin, it can function passively by just waiting for trout to approach the setup and try to eat the bait.

The second method it can operate is by actively bringing it to the bottom of the water level with the aid of floating lures as part of a team effort. These two methods may be quite effective, and you should consider using a Carolina rig for trout fishing without hesitation.

Carolina Rig Setup For Trout

To catch a trout first, you need to set up the Carolina rig. So here are some of the things that you might need:

  • An ultralight power spinning rod that is 7-8 inches approximately
  • Spinning reel of size between 1000 to 2000
  • Test main line of about 6 to 10 lb
  • Test fluorocarbon leader of about 4 to 6 lb
  • Sliding Sinker of ⅛ or can be ¼ oz
  • Beads made of plastic
  • Barrel swivel of size 8
  • Hook of size 8 to 12

As we go about, the initial step is to tape the spinning reel to the mainline. After you’ve finished this step, you may begin tying the rig. Following that, thread a 1/8 or 1/4-ounce sliding sinker onto your main line.

Now you can either choose to use a bullet sinker or an egg sinker whichever suits you best. A further step includes threading a bead made of plastic over the line. After that mainline is tied to an 8-size barrel swivel.

Take your fluorocarbon leader line and connect it to the opposite end of the swivel after tying the swivel to the mainline. After that, you’ll need to measure roughly 12 to 14 inches of leader and cut it from the spool using a sharp knife. After that, you’ll need to connect a size 8 hook to the very end of the leader line.

The sort of hook you’ll need will be determined by the bate you think would be ideal. For example, a treble hook will give you fantastic results with power bait, and you can disguise the hook by curling the power bait around it to make it work. As a consequence, in the vast majority of circumstances, you will have a favorable outcome.

Another example is the use of a worm. In this situation you’ll only need one hook, you can rely on the bait keeper hook to do the job. The bait keeper hook’s benefit is that it contains two additional barbs on the shank that prevent the worm from sliding off the hook and staying in place.

Which Carolina Rig Bait To Prefer For Trout?

When it comes to choosing a bait that will work well with a Carolina rig such that it floats, we recommend either power bait or a nightcrawler worm.

Because trout do not directly take food from the bottom, but rather from food spread in the water above the bottom level, the Carolina rig accomplishes its work by handing over the bait close to the bottom.

It is your responsibility to make sure it is still a little above the bottom level of water. As a result, if your food-holding hook is near the bottom, it’s unlikely that you’ll be able to catch trout.

If you don’t want this to happen again then you need to choose a bait that can float sufficiently so that your hook is lifted in the water, especially at least 1 or 2 feet above the bottom level of water so that it makes it simpler for you to catch a trout.

Using Carolina Rig To Fish Trout

To fish trout, you can use a Carolina rig in two ways:

  • We may simply cast the Carolina rig with the aid of a floating bait, such as a power bait. We may set the rig after casting it out and wait for a trout to try to eat the bate so we can capture it.
  • We may also employ a man-made or artificial lure, like a floating jig head that is baited with a plastic worm. One thing to keep in mind is that in this scenario, you’ll need to work hard to get the rig set up correctly so that the trout sees and eats the bait.

It makes little difference which bait you use; what matters is how much time you give the trout to consume the bait. After you’ve given the trout enough time, you may set the hook.

For example, a fish, most likely a trout, may readily accept the bait with little resistance when using a sliding sinker, ensuring that the time it takes the fish to get the bait entirely within the mouth is counted before the hook is set.

If you want to cover additional ground, you should throw and retrieve the Carolina rig now and again. But, to make this a reality, you’ll need to learn new talents and practices.

Also, it is dependent on the fish, not your method of capturing the trout, since it likes bait over lures at times and lures over bait at other times.

Using a rod like a power bait or worm is one of the greatest methods to cover both of the aforementioned alternatives. You may then toss the lures with a different rod.

A nice technique is to use a floating lure with a Carolina rig and utilize it in such a manner that it lowers to the bottom, rising your rod tip a little, maybe 4 or 5 feet, and then lowering it again when reeling.

At this stage, you must ensure that your rig does not come up too quickly, as trout require time to inspect everything surrounding the lure to get it to the sinker. Set the hook on count till 3 after you know the fish has taken a bite.

Carolina Rig For Speckled Trout

The most successful approach to bait speckled trout is to use a Carolina rig. To build a Carolina rig for speckled trout, run your mainline through an egg weighing 1/2 or 1 ounce and attach it to a swivel. If your mainline is braided, it’s even better.

After that, knot a test monofilament or fluorocarbon leader line of 20 to 30 pounds to the other side of the swivel. After that, you can easily tie your hook.

Frequently Asked Questions (FAQS)

What Does A Carolina Keeper Do?

As an alternative to a swivel, a Carolina keeper is employed. The ability to make quick changes is the key reason for having a Carolina keeper. Squeezing the keeper and shifting it to the desired location on the line does this.

How To Use A Carolina Keeper?

To use a Carolina keeper, locate the slit, which is essentially a little incision in the tube. After you’ve found the slit, slide the keeper into the plier so that the slit goes up and down.

Then, gently squeeze your plier to open the hole, and then insert your line through it while it is still open. Simply get off the plier and the Carolina keeper will be trapped wherever you want to stop. To move the Carolina keeper, repeat the steps to reposition.

Why Choose Carolina Rig For Trout Fishing?

The Carolina rig for trout fishing is a terrific tool to use every day and is extremely beginner-friendly. When all of our other ways fail, it can catch trout or any other fish.

That is the significance of the Carolina Rig. It works well for trout because it holds the bait near the bottom but not at the very bottom, just above the bottom water level, allowing the trout to see and approach the bait.

A Complete Guide To Lindy Rig Fishing

You’ve undoubtedly heard of the Lindy rig if you’ve ever talked to another fisherman about walleye fishing and the best baits or fishing gear to utilize. This rig, which was first introduced in the 1960s, is incredibly popular and highly desired for landing your next prize walleye.

Lindy Rig Fishing Guide

We’ll go over the basics of how to tie a Lindy rig, as well as when and how to use it, in this post. We’ll also show you some of the most successful versions of this rig, which can help you catch a lot more fish.

What is Lindy Rig?

Lindy rig diagram

While the Lindy rig is most commonly associated with walleye fishing, it may also be used to catch bottom-feeding or low-column species like sucker-mouth catfish, bass, and trout. The rig is designed for fishing in shallow water and has a snelled hook on a leader that is also attached to a sliding sinker.

There are a variety of methods to customize the Lindy rig to your particular tastes or needs, such as adding a sliding float to modify the presentation of your bait, whether it’s live minnows, crawlers, or leeches. Once you’ve learned how to tie a basic Lindy rig, you might be able to tweak it to your liking.

Lindy Rig Setup

Lindy fishing rigs are simple to construct and may be tweaked in a variety of ways to achieve the greatest results.

The most challenging aspect of angling is making knots, yet spending the time to learn your fundamental knot methods may help you improve your angling skills significantly.

You’ll need a few things to construct a Lindy rig:

  • Mainline: 10 to 15 lb test braid or monofilament
  • Leader: 4 to 6 lb test fluorocarbon
  • Weight: 1/8 to 1 oz sliding sinker
  • Swivel: size 4 to 6 snap swivel
  • Hook: size 2 to 6 octopus hook

Setup:

  • Step 1: Tie your mainline to the snap swivel after threading it through the sliding sinker.
  • Step 2: After that, snell a size 4–6 hook onto the leader line, measure out 2–5 feet of leader length, and knot a loop at the end.
  • Step 3: Finally, just clip the leader’s loop onto the snap swivel, and you’re ready to go.

Best used with: A Lindy rig with a 6 to a 7-foot long spinning rod with quick action and a light to medium light rod weight is recommended. The ideal size of spinning reel to use is between 2000 and 3000.

Lindy Rig Weight

When it comes to getting the most out of your Lindy rig, choosing the appropriate weights is critical. The Lindy walking sinker is a flat, elongated, and curving piece of lead with a big eye at the top that allows the line to slide through easily in the original form.

The Lindy no-snag sinker, a banana-shaped sliding sinker with a wire extension at the bottom that makes it far less likely to be caught on the bottom structure, is a more sophisticated form of the sinker.

Lindy no-snag sinkers are highly recommended for avoiding getting your weight snagged. That being stated, you may certainly take advantage of any.

Lindy Rig Variant

There are several versions of the Lindy rig but we’d like to focus on three of the most significant, which have greatly enhanced the rig’s performance and made it more successful for capturing fish in particular scenarios.

Floating Lindy Rig:

Floating Lindy rig diagram

The floating rig is designed to maintain your hook and lure a few inches above the muck on the lake’s bottom, and the distance will be determined by the length of your rod and the leader you pick.

To keep the bait from floating, use a prone line or add a tiny float or bobber to the leader. Crawlers, minnows, and other natural lures will aid in the natural movement of walleyes.

Both walleye and trout will eat bait right at the midline, but they appear to prefer live and active food up to 12 inches above the midline.

Furthermore, this rig is particularly beneficial in locations where grass, trash, or any other structure near the lake’s very bottom is frequent, as it prevents your hook from becoming caught.

Lindy Rig With Floating Jig Head:

Lindy rig with floating jig head diagram

A floating jig head, in addition to the methods outlined above, is a highly efficient technique to make your bait suspend over the bottom and more enticing to fish in the lower water column.

This type of rigging is typically used with live bait or minnows to ensure that the bait moves naturally while being suspended by the floating jig head at the correct height.

This can assist in attracting dispersed walleyes, allowing them to rapidly take your hooks and provide a satisfying tug on your reel.

Lindy Rig With Crawler Harness:

Lindy rig with crawler harness diagram

Most experienced walleye fishermen swear by the success that utilizing nightcrawlers as live bait brings with walleyes during the summer. You should utilize the crawler harness to guarantee your worm stays attached to do so successfully.

Simply tie the loop to the swivel on your Lindy rig after your harness is ready to go, and you’re ready to drop it in the water and fish.

If you’re fishing with large nightcrawlers, consider using a tiny float or bobber to keep them elevated over the muddy bottom; otherwise, they’ll drop like a rock.

How To Fish A Lindy Rig

Lindy fishing is a very adaptable sport that can be done in a variety of ways. You may cast it out with a baited hook and wait for a bite, cast and recover it, drift it, or troll it.

Lindy Rig Trolling

When trolling with a Lindy rig, it’s critical to keep constant contact with the bottom, which necessitates the use of the proper weight and trolling speed. Keep your line at a 45-degree angle and check for regular bottom contact with your sliding sinker as a rule of thumb.

The ideal trolling speed for a Lindy rig is 1 to 1.5 mph, and you’ll need to upsize your sinker to 1 or 1 1/2 oz to get it down to the bottom efficiently.

You don’t want to troll too rapidly with a nightcrawler Lindy rig, especially if you don’t want to pull the worm off the harness. You may also use it for trolling with a slow-death setup, which works well with nightcrawlers.

Lindy Rig Drift Fishing

A Lindy rig is often used to catch walleye when drift fishing. It’s made for this type of fishing and can maintain your live or artificial bait in the optimum strike zone with ease.

Maintain complete contact between your sinker and the bottom of the lake, as with the trolling approach previously stated.

The Lindy rigging will assist you to avoid snags from your hooks on water grasses, twigs, and stones, even if there is debris or another underwater structure to watch out for.

FAQS

How To Make A Lindy Rig?

You can buy the pre-made Lindy Rig Kits which are the simplest method to put up a Lindy Rig. Also, you can make your own from scratch which is another alternative and is more cost-effective for the hard-core fisherman or lady.

Setup:

  • Step1: Choose your fishing line and spool it onto your reel.
  • Step 2: Slide your sinker onto the end of the line (either this type of Lindy Walking Sinker or the newer design No Snag Sinker).
  • Step 3: To keep the sinker in place while enabling it to glide up and down the line, tie the barrel swivel to the line.
  • Step 4: Attach a 12-36-inch length of line to the barrel swivel’s opposite end. You can choose the length, however longer is more usual.
  • Step 5: Use a snell knot to secure your size 2, 3, or 4 hooks to the end of this line.

How To Use A Lindy Rig?

When using a Lindy rig to fish, the goal is to troll it gently through the water at the bottom of the lake or river. The live bait should descend fast and maintain some natural movement slightly above the muddy bottom, while the sinker should keep the line drawn down in a U shape.

In this scenario, the natural movement of a minnow or nightcrawler will help keep walleyes engaged.

Try Lindy Fishing!

The Lindy rig is the greatest technique to obtain surefire strikes from that huge trophy fish. Walleye are a fantastic species for both beginners and expert fishermen to target.

How to Choose the Right Kind of Fishing Line in 2023?

After the rod, the fishing line is the most important piece of fishing equipment since it connects you to the fish. A fishing line is a long threaded material (typically nylon, silk, or wire) used to capture and reel fish using a fishing rod.

It’s what’s thrown from the rod, travels through the air, and eventually rests in the water’s depths. Every move, every tug, every drag-screaming rush passes through the line to the fisherman from hook to rod.

Fishing Line types

You’ll need a fishing line no matter how or where you’re fishing. It’s the line that links your entire rig together, whether you’re trolling for Tuna offshore or flipping for Bass in your local pond.

More significantly, you’ll require the appropriate line. With that in mind, we’ve compiled a list of fishing line types that are available in the market.

Different Types Of Fishing Lines List 2023:

1.) Monofilament Line

2.) Copolymer Line

3.) Fluorocarbon Line

4.) Braid Line


  • Monofilament Line


The term “monofilament” refers to a single thread. A single sheet of plastic, generally nylon, is stretched out and fitted into a narrow tube, and that’s exactly what this is. Mono has existed since the 1930s. It may not be cutting-edge, but it’s a tried-and-true “jack of all trades” that remains the most popular line.

Advantages

  • Mono is less costly than other lines, stretches to accommodate shocks, resists abrasion, and has a consistently round cross-section, which helps it stay clean on the spool. Monofilament is simple to tie knots with, although it has a tendency to “memorize” the shape of the spool.
  • Mono comes in a variety of colors, but transparent and blue are particularly popular since they vanish underwater and are difficult to spot by fish.
  • Monofilament fishing line is one of the most common varieties of saltwater fishing line available.

Disadvantages

  • For a given diameter, monofilament is not as strong as braid, hence higher pound test mono takes up more area on a spool.
  • It’s also nylon, which means it degrades over time when exposed to sunshine, thus re-spooling with a new line once a year is essential.

When To Use Mono

For novices, monofilament is ideal. If you’re new to fishing, start with monofilament. It’s inexpensive, simple, and works well on all reels.

It also lessens the punishment of battling fish by maintaining line tension and smoothing out strong head jerks. When fishing at deep or for tough-mouthed species, though, switch to something different.


  • Copolymer Line


The monofilament fishing line has been enhanced using a copolymer fishing line. It’s constructed in the same fashion, but with two or more materials rather than one (usually different forms of nylon).

This allows producers to fine-tune their formula and adjust the properties of the line to specific applications.

Advantages

  • It has less flexibility than mono but maintains shock resistance.
  • It’s still easy to tie knots and throw, and it has even less memory.
  • It’s also more abrasion-resistant and tougher than mono for its size.

Disadvantages

  • Normally, the copolymer line does not float. That isn’t always a good or negative thing; it is just different.
  • The only real disadvantage of the copolymer is its higher cost.
  • Because it’s still made of nylon, it’ll be harmed by the sun and heat just as easily.

When To Use Copoly

“Whenever you want,” is the brief response. It works well on all reels and is ideal for deep-water techniques like jigging and suspension rigs.

There are other surface-fishing-friendly recipes available as well. There’s no reason not to upgrade to copolymer if you don’t mind spending a bit extra.


  • Fluorocarbon Line


A fluorocarbon line is created in the same way as a nanocarbon line is, but with a denser substance. It’s related to the substance that prevents your pans from sticking (Teflon) and your freezer cool (freon).

Fluoro initially became popular in the 1970s. It was only used as a leader at the time since it was stiff and difficult to manipulate. Since then, things have progressed significantly.

Fluoro is one of the different varieties of fishing lines available for freshwater, saltwater, and fly fishing. It’s completely imperceptible underwater and extremely abrasion resistant, making it the ideal braid complement.

Advantages

  • The major advantage of fluorocarbon is that it is virtually undetectable underwater.
  • Although it isn’t as strong as mono or copoly, it is extremely abrasion-resistant and lasts far longer than other lines.
  • It can stretch, but only when put under a lot of strain. This translates to strong shock resistance without sacrificing accuracy.

Disadvantages

  • If knots aren’t done correctly, they’ll fail, and the line’s high memory will cause it to twist and kink at the drop of a worm. It’s also prohibitively pricey.
  • Consider it a high-end, high-performance fishing line, but you’ll need to know what you’re doing with it.

When To Use Fluoro

Fluorocarbon is a fast-sinking line, so it’s best for jigs, drop shots, and other bottom-fishing techniques. On a spinning reel, you can use a very light line, although it’s best suited to bait casters.

Its principal application, as you may have surmised, is for fishing in crystal clear water. Many people also use a few feet of fluoro as a leader to deter predators who hunt by sight, such as Pike.


  • Braided Line


Brain line is manufactured by weaving together numerous strands of Dacron, Spectra, and Dyneema polyethylenes. This results in a super-thin line capable of stopping a Swordfish in its tracks.

Advantages

  • A braided line is made up of four to sixteen strands. A braid with fewer strands is more abrasion resistant, whereas a braid with more strands is thinner.
  • In any case, it’s constructed to last and is by far the strongest line pound for pound. Because braid has no memory, it may flow freely without kinking.
  • Because braid does not degrade in the sun, you may keep it on the spool year after year.
  • It is also non-stretchy and with the trade-off of lesser shock strength, you get perfect accuracy.

Disadvantages

  • Because the braid is slick, you’ll need to select knots that will hold despite the minimal friction.
  • Underwater, braid sticks out like a sore thumb, is difficult to tie knots with, and can be cut off by toothy fish.
  • Because it is so resistant and thin, it can bury itself in the spool and cause harm to less expensive equipment.
  • It makes such a mess when it backlashes that you often have to cut it out.
  • Because the braid is so strong, cutting it requires nail clippers or very sharp scissors.
  • It’s also the priciest of the group.

When To Use Braid

If you’re fishing in low-visibility waters or need a lot of line on your spool, braid is the way to go. Deep jigging and precision jigging are two popular techniques.

It’s also wonderful for cutting through weeds and thick foliage because it doesn’t get tangled up in them. Braid is most commonly seen on spinning reels, although it may be used on any type of reels as long as it is of good quality.

Characteristics of Fishing Line

  • Memory: Is the line on your spool hanging straight or curling up when you pull it off? That’s how memory works. As you reel in, a line with a lot of memory can kink or knot. It also interferes with your presentation and makes casting a long distance more difficult.
  • Stretch: When fighting a fish, a stretchy line maintains tension better. It also lessens the impact of large head motions. Stretch, on the other hand, reduces accuracy and feedback, making it more difficult to place the hook.
  • Shock Strength: Another benefit of having some stretch is that it reduces the likelihood of your line snapping under abrupt strain. This is shock or impact strength, and it prevents you from being broken off by hard-hitting fish.
  • Abrasion Resistance: Have you ever been fishing and had your line cut off by rocks? You’ll need clothing that can withstand abrasion. The current line is abrasion resistant in general, although higher-end materials withstand scratches better.
  • Visibility: If a fish notices your line, it may become agitated and refuse to bite. In clear water, people normally use a low-visibility line to avoid this. The colored line can also be used to match the depth and hue of the water you’re fishing in.

General Fishing Line Tips And Tricks

  • If you’re fishing thick cover on a regular basis, inspect your line for nicks, wrinkles, and other flaws that might cause backlashing or poor casting.
  • Always buy and have more lines on hand than you think you’ll need. You’ll very certainly discover that you go through a lot more than you thought.
  • Protect your fishing line, especially the nylon line, from damaging UV rays when storing it. UV rays can degrade the line’s strength over time. If in doubt, start each season with a new spool.
  • To minimize line strength loss in the knot region, use real perfected knots no matter what sort of line you’re employing.
  • Try to match the type of line you’re using to the type of rod and reel you’re using.
  • A fishing line is only as good as the quality of the knots used to connect your lures and bait, so be sure the knots are strong enough.
  • If you’ll be casting frequently, choose smooth, light lines that come off the spool more easily, allowing you to make more precise casts over greater distances.

Frequently Asked Questions (FAQS):

Which fishing line is better, mono or fluorocarbon?

Fluorocarbon may be the preferable alternative for fishermen wishing to add strength and sensitivity to their line (especially when fishing for large fish). It will also survive longer than monofilament and be able to handle larger fish with the same line diameter.

If you use the correct sort of spinning fluorocarbon line, fluorocarbon may also perform effectively for expert spinning fishers.

Which is the most versatile fishing line?

Fluorocarbon is the most adaptable of the three most used fishing lines. It can be used for any type of fishing, even topwater, and while some may disagree, We prefer a softer/slower rod combined with a stiffer line to a stretchier line paired with a stiffer rod.

When should I use a fluorocarbon line?

It’s a great line to have on hand when you require limited visibility and a little stretch – which might be in any fishing circumstance. A fluorocarbon leader is an excellent option if you’re targeting any fish in clear water to minimize visibility and boost hook-ups.

When casting crankbaits, wacky worms, Texas rigging, or rigging for walleyes or crappies, you can use fluorocarbon.

Which type of fishing line is best?

Monofilament is the greatest versatile line. For years, it’s been an excellent all-around bass fishing line that’s also economical.

Monofilament is perfect for running shallow-diving crankbaits through wood or rocks because it has more flexibility than fluorocarbon or braid. The extra stretch in the line helps the crankbait kick off the cover easier when it hits an item.

Monofilament is particularly ideal for using with suspended stick baits since it floats, allowing the lure to stay in the striking zone for longer. Fluorocarbon absorbs water and sinks, reducing the buoyancy of the suspended bait.

Choose The Right Fishing Line

If you want to capture and reel in a fish using a fishing rod, you’ll need the assistance of a fishing line. To make it easier for you to decide, we’ve put up a list of the best fishing lines that you may use based on your preferences. The list also includes the benefits and drawbacks of the various fishing lines.