Common Spinning Reel Problems (And How To Fix Them)

We all have exciting hobbies that keep us occupied during our free time. These hobbies are not only for keeping us busy, but they are also ways to distract us from our daily routine. In this article, we are going to discuss a particular hobby in specific. Fishing! If you are a fishing enthusiast, you would have come across many spinning reel problems and other fishing-related problems. This is where we come in to save you. In this article, we will solve all your fishing-related issues and improve your experience.

Common Spinning Reel Problems

Fishing Reel Repair:

It is very common for your fishing reel to get a little rough now and then as they are exposed to different types of water and sand. The sand often gets collected in your reel or slightly damages it. Apart from that, there are several other reasons such as the spool becoming worn out and so on. However, it is not impossible to fix these small problems.

The first step is to identify the problem, and you can easily do it according to the type of reel you have.

  • If you have a fly fishing reel that is not working properly, just replace the spool that is broken, and you will be all set.
  • If an open-face spinning reel’s bail breaks, then you will have to replace the parts with new ones.
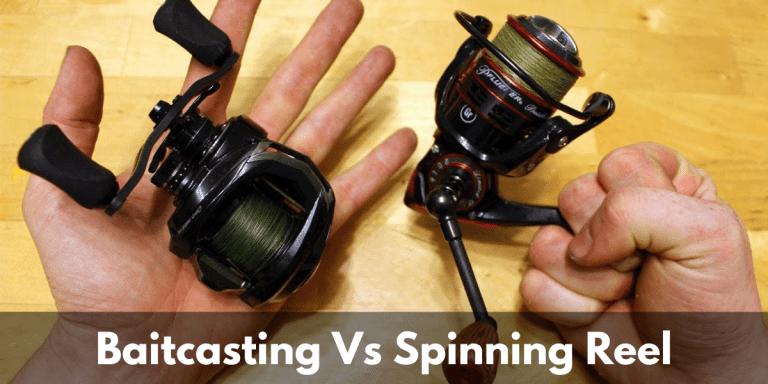
  • If a bait-casting reel is not working, then you will have to replace the springs and the drag washers to have a functioning reel.

Some of the common tools you need for replacing or repairing fishing reels are lubricants, pliers, wrenches, and screwdrivers. These are readily available tools that will aid in repairing the tools.

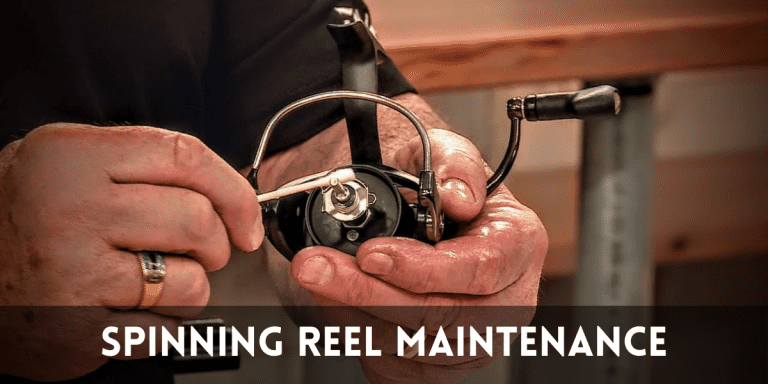
To repair an open-face spinning reel, you have to unscrew the nuts and the bail that holds the spool down. After that, remove the locknut that secures the bail arm and then remove the bail spool. Once you have done that, you can look at the parts and replace or fix the damaged parts accordingly. Mostly, you would find that the spring is damaged. If it is manageable, you can just slightly fix and put the reel back together, but if it is fully damaged, you might have to buy a new spring and replace it.

To replace other parts like the drag washers and springs on a bait-casting reel, you have to start with the common step of unscrewing. You have to unscrew the nuts and remove the handle. You will have to be careful during this step, as you do not want to loosen the drag washer as you try to loosen the handle. Once you are done with that, remove the plate screws, plates, bridge screws bridge, main gear, spring, ratchet, and spool. Clean the reel and the other parts thoroughly and change the worn-out parts and rebuild the reel again.

To replace the spool in a fly fishing reel is very simple and involves only three steps. You have to remove the axle cover and the V-spring in the old spool and replace it with a new V-spring against the catch. Make sure to align the spool screw holes, cover, and tighten the axle catcher.

My Spinning Reel Is Hard To Turn!

We are sure this is a constant trouble every season. It is so disappointing to catch something big, but your reel is stuck, and you don’t know how to make it more smooth. To overcome this, you just have to follow some steps and tricks to maintain your reel well. As already mentioned before, the difference in the salt content of the water you fish in would significantly influence how easily the reel would spin.

If there is a high level of salt built up in the main parts of the reel, it will stop it from working smoothly. To avoid this, you will have to dismantle your reel and fully clean all its parts regularly. However, if you are not so nifty and feel like you will not be able to reassemble, then just visit your local tackle shop and tell them your concerns and get it cleaned professionally.

Another way to help to get a smoother spin in your reel is to use lubricants and loosen the parts a little. This will oil the parts well and make sure that it is smooth. However, this will also only work best when your reel is clean and has no built-up.

Do note that you should only grease the parts that need it, and if you randomly add the lubricant all over the reel, you may damage the parts.

After you are done cleaning thoroughly once, make sure to wash it down every time you use it lightly. With the help of a light spray, you can remove any dirt or build-up that was collected during fishing. This way, your reel will be well maintained and will not require regular cleaning at the tackle shop.

Also Read: How to Clean a Spinning Reel for Better Performance?

Noisy Spinning Reel Troubleshooting

It is surely a mood killer when you are trying to have a quiet time and just fish, but your reel makes this high-pitched annoying noise every time you try to reel in. As soon as you hear this noise, you might think it is because of a damaged bearing. However, that is not the case, as a damaged bearing would make it really difficult for you to reel in, and it would be a clicking sound rather than a squeak.

You get that high pitch, squeaky noisy it probably has something to do with the plastic parts that are inside the reels; that is, your reel’s breaks. Inside your reel, you will have a plastic or a fiber tab that would have been rubbing against each other or on a dry surface in your breaks. This is what causes that noise. To overcome this problem, simply oil the parts and keep them well lubricated.

It is very important that these parts are not rubbing on a dry surface, as it creates a lot of friction and will melt the parts in the longer run. You can just rub some oil inside the brake ring every month. This will endure that your reel breaks smoothly and does not make any annoying noises.

Let us move on to answering some of your frequently asked questions. You might have some more doubts and questions, or who knows; it might also answer things you did not think about before.

Frequently Asked Questions:

How to adjust the bail on a spinning reel?

To either adjust or replace your bail on a spinning reel, you will need some pieces of equipment and some knowledge about bail and reels. However, do not worry; we will take you through it step by step with all the tools that you will need.

Step 1: Loosen the screw that holds the bail arm’s base using a #1Phillips screwdriver.

Step 2: Pull out the bail arm away from the reel slowly using a twisting motion.

Step 3: Once you have removed that, you can easily remove the worn-out part now. Remove it by pushing down on the spring and pulling it outward from the reel.

Step 4: Replace the broken bail spring with a new one by separating the pin from the spring and then just placing the original pin in the new spring.

Step 5: Once you place it, push the spring back to its original position.

Step 6: Realign all the parts and tighten the reel back to its original position.

That is all you need to fix or adjust your bail on a spinning reel. If you are not very good at removing and fixing things, then just visit your local tackle shop and ask them to do it for you. Remember, in this case, it is essential to work smarter, not harder.

How to put a new line on a spinning reel?

Using a spinning reel makes life so much easier for a person interested in fishing. To change a new line on a spinning reel is a simple process, and we will clearly walk you through it.

Before learning how to add the line, then you need to select the right type of line. ​​Braid is the way to go if you’re spooling a medium-sized spinning reel and your fishing style needs something heavier than a 12-pound test. Start with a small amount of mono on the spool as a backup if you’re going with braid. As a result, the braid will not slip off the spool. Using a Uni Knot, you have to attach the braid to the mono when the backing is in place, then spool up as described below.

Step 1:

When the reel is connected to the rod, installing a fishing line on a spinning reel is much easier. So first, attach the reel to the rod.

Step 2:

Once you do that, remove the end of the line from the spool and feed it towards the reel through the first guide—the large one closest to the reel seat.

Step 3:

It’s critical to remember to release the bail. It’s incredible how many people ignore this step. After carefully hooking the line to the spool, they return to this stage and realize the bail won’t pick it up. To save time, remember to open the bail exactly before attaching the line to the spool.

Step 4:

It’s relatively simple to learn how to knot a line to a reel. Wrap the line twice around the spool of the reel and secure it with an over-hand knot. Trim the tag’s end to a close fit.

It is your choice; you can leave part of the old line on the reel as a backup if you’re restringing your reel because the line on it is worn out. You may simply tie a Uni knot to join the old and new lines if you do. When relining your reel, this technique can help you save money by requiring a less new line to fill the spool.

Step 5 :

You can now close the bail and start carefully turning the handle. As you crank, the spinning bail will place a line on the reel spool in equal wraps. Come to a standstill after a few cranks.

Step 6:

Hold the rod parallel to the floor while standing up. Place the line spool in front of you on the ground, with the label facing you or the floor.

Start cranking the reel while applying a little stress on the line (with your hand, between the reel and the first guide). Watch the line near the spool on the floor after about ten cranks, then lower the rod to provide slack.

This is the decisive moment, and you’ll either see one of two things. The slackline will either lay in pleasant, relaxing loops on the floor, or it will twist over itself into coils that don’t appear to be relaxed at all. At that time, you should see relaxed coils; if not, simply flip the spool over and repeat the test.

Step 7:

Now, all you need to do is a reel with a line. Standing up and facing the spool on the floor, parallel the rod, apply some tension to the line by grasping it between the reel and the first guide, and slowly crank. Pick up the pace and keep going until the line is between 1/8 and 3/16 inches from the spool’s lip. Once you do that, cut the line and thread it through the remaining rod guides before tying on a lure.

Even though these look like many things to do, they are fairly simple steps if you actually do them.

What causes a spinning reel to stick?

There are several reasons why your reel might get stuck or stick together. As already mentioned several times, the salt content in the water that you fish in matters a lot. We know that we probably sound like a broken record at this point, but you need to keep your reel clean in order to avoid minor problems like this. In the future, make sure to clean your every time you come back from fishing. Ensure there are no salt or other particles deposited in the reel and the inner parts.

To solve this issue of your reel getting jammed, you need to dismantle your reel, clean all the part and grease it up. It is a relatively simple process if you are well aware of the elements of the reel and how to put together the reel. If not, it is our best advice to just visit your local tackle shop and let the professionals handle it for you.

How do I make my spinning reel smoother?

Again, some of the reasons why you reel might be because of corrosion, salt deposits, old bearing, and over or under lubrication. The only way to make your reel smooth is only possible by removing all the parts, cleaning it, and lubricating it. That is all that you need to do.

For almost most of your reel-related problems, you might have to dismantle your reel and put it together. However, you should know your reel well. You need to make sure you align the parts, and bearings and you should also ensure that you only oil the parts that need to be done. If you are not aware of these, we can not stress enough that you should get it done by a professional.

How do I stop my spinning reel from twisting?

You just need to follow some simple tricks and tips that will help you!

Make sure your reel isn’t overloaded. Leave a 1/8″ space between the top of your line stack and the spool’s lip. If the space is too small, the line will bounce off the reel. If you use too little, it can cause extra drag when casting.

Hand-wrapping line onto your spool will almost certainly result in a twist.

When spooling the line, don’t put too much tension on it. You’re pinching too hard if the line starts to feel heated in your fingers. When the fishing line is stretched too far, it behaves like a rubber band, retracting and unspooling when the strain is released.

When spooling, don’t use too little tension on the line. You’ll get a lot of tangles if the line is packed carelessly onto the spool. Apply just enough pressure to ensure that the line stack is snug and even, but no more.

We understand that the article was packed with a lot of information and if you are a beginner, you will indeed feel overwhelmed about not knowing much about your own hobby. However, we all have so many fun hobbies that are near and dear to us. You have to understand that no one is born a master of a craft, and only continuous practice, passion, and effort will help us succeed in anything and understand it better. We hope this article helped debunk all of your spinning reel problems.

Additional resources:

What Is The Price Of A Fishing License? (2023 Comparison Of All States)

Did you know that it’s illegal to go fishing without a fishing license? You probably want to know what a fishing license is and how much a fishing license costs if you’re here.

Licensing is a significant part of fishing. The angler must have a valid license before engaging in any fishing activity to be legal. To fish lawfully, you must have a fishing license. Every person required to have a right to fish, hunt, or trap must carry such a license.

price of fishing licenses list

This article will discuss the cost of licensing and the types of licenses worldwide, so you can better understand what you may want to purchase when traveling or planning your next fishing adventure.

What is a Fishing License?

A fishing license is an authorization that allows a person to fish for certain types of water-based sports. This includes the sport fishery, non-commercial fishing, and commercial fishing. It also authorizes the holder to buy and sell fish and bait for earlier purposes.

The government issued a type of license to allow commercial or recreational fishing to specific kinds of fish. These licenses are usually issued for a particular period, often year-round.

To obtain a fishing license, anglers must have the appropriate qualifications and experience and meet specific age requirements depending on their location.

There is no universal license type that exists throughout the world. Some locations have a single form of universal fishing license, while others have different types of licenses based on the kind of fishing you conduct. For example, some countries have recreational fishing licenses, and others have two – one for commercial and one for recreational.

Fishing License Types:

A fishing license determines what type of fishing you can do and the number of fish you can keep. There are a few different fishing licenses with other costs and requirements based on what fishing they allow. The type you require will be determined by several criteria, including where you reside and the kind of fishing you want to perform.

Fishing is subject to several rules and restrictions. A fishing license is required to fish lawfully.

Recreational Fishing License:

It is the license given to people who want to enjoy fishing for recreational purposes. Allows recreational anglers to catch any species within specified limits.

General Fishing License:

It is the most common type of fishing license, and it gives the individual the privilege to fish in all seasons without any limitations.

Commercial Fishing License:

This type of fishing license is usually determined by what you intend to catch with your boat or net, but it also includes catching crabs or lobsters that fall under this category. Grants access to specific waters with certain limits for catching fish for sale, including but not limited to shark or swordfish.

Freshwater Fishing Licenses :

State agencies issued these licenses and allowed the holder to fish anywhere within certain general geographical limitations.

Saltwater Fishing Licenses:

State agencies issued these licenses and allowed the holder to only fish in specific locations and saltwater areas. These are usually on coasts but can also be near bays and estuaries.

Sport Fishing License :

A sportfishing license is limited by state law and regulations to catch specific species with a certain limit.

Fishing License cost

A fishing permit, also known as an angling license, is a piece of paper that allows you to fish in a specific body of water. Fishing licenses are typically obtained from the state agency managing the given body of water.

A variety of factors determines the fishing license fee. There are different fees for annual and seasonal permits.

The cost can vary depending on how long you want your permit to be valid for, what size your boat is if you have a trout stamp or not, and whether you have annual or temporary access. A temporary permit is only valid for three months before it needs to be renewed, while a yearly license is valid until the following year’s harvest – meaning that you can use an annual permit all year round if you want.

A lot of people don’t know how much it costs to apply for a license, so we’re going to break down what that might look like if you were in the U.S. Top places-

Texas Fishing License cost:

The cost of Texas fishing licenses is determined by the type of license you purchase. The cost of a fishing license varies.

Fishing licenses are classified as either resident or non-resident, and the rates vary based on which class of license you apply for. For instance, if you want to apply for a fishing license in Texas, your application will be considered for a resident or non-resident classification.

>For Texas residents, the cost of a fishing license is-

  • The cost of an all-water fishing license is $11.00 per day and $40.00 per year.
  • Freshwater fishing licenses are $30.00 per year.
  • A saltwater fishing license will set you back $35.00 per year.

>For Taxes non-residents, The cost of a fishing license is-

  • The cost of an All Water Fishing License is $16.00 per day and $68.00 per year.
  • A freshwater fishing license will cost you at least $58.00 per year.
  • An annual saltwater fishing license is $63.00.

California fishing license cost:

A California fishing license is estimated as the cost of a fishing license in California, based on residency.

California, by contrast, has the highest fishing license cost in the country. This makes it necessary for Californians to travel outside of their state to participate in their favorite hobbies or earn cash.

>The cost of a fishing license for California residents-

  • 1-Day license: $17.02.
  • 2-Day permit: $26.49.
  • Annual pass: $52.66.

>The cost of a fishing license for California non-resident-

  • 1-Day license: $17.02.
  • A 2-Days permit is $26.49.
  • 10-Days license: $52.66.
  • Annual license: $142.05.

North Dakota fishing license cost:

In the summer, North Dakota is a fantastic spot to fly fish. The North Dakota fishing license is a way to protect the fishing grounds. Residents or non-residents can use the license for up to 16 years.

>The cost of a fishing license for North Dakota residents-

  • Fishing license (up to 16): $16.
  • Married couple fishing license: $22.
  • Senior citizen fishing license: $5.
  • Permanently disabled fashion license: $5.
  • Paddlefish: $5.

>The cost of a fishing license for North Dakota non-resident-

  • Individual season fishing: $45.
  • Married couple season fishing: $60.
  • Three-day fishing: $25.
  • Ten-day fishing: $35.

Virginia fishing license cost:

To apply for a fishing license, you must be 16 years old and have lived in Virginia for at least 90 days. You can also obtain one if you are adopted from the state and work as a commercial fisherperson there. Residents and non-residents alike must obtain a fishing license in Virginia.

>The cost of a fishing license for Virginia residents-

  • One-year license: $23.
  • Two years license: $44.
  • Three years licenses: $65.
  • Freshwater fishing license: $39.50.
  • Saltwater water fishing license: $17.50.

>The cost of a fishing license for Virginia non-resident-

  • One-day freshwater fishing license: $8.
  • Five days freshwater fishing licenses: $21.
  • Ten days saltwater fishing license: $10.

Alabama fishing license cost:

The person applying for this license must be at least 16 years old (or 14, if they are enrolled in high school). You will need valid photo identification and a copy of your hunting or fishing license from your home state.

>The cost of a fishing license for Alabama residents-

  • Annual license: $14.05.
  • Daily permit: $6.45.
  • Disabled license: $3.05.
  • Spearfishing license: $6.00.

>The cost of a fishing license for Alabama non-resident-

  • Annual license: $54-$66.
  • Seven-day trip license: $30-$32.
  • Family 3-day trip license: $30-$33.
  • Spearfishing license: $8.50.

South Carolina fishing license cost:

The cost of a fishing license varies in South Carolina, which differs according to a person’s age and residency.

>The price of a fishing license in South Carolina for residents-

  • The cost of a freshwater fishing license is $10 per year.
  • A freshwater fishing license for 14 days is $5.
  • A saltwater fishing license costs $15 a year.
  • A saltwater fishing license for fourteen days is $10.
  • Annual commercial freshwater license: $50.

>The cost of a fishing license for South Carolina non-resident-

  • A saltwater fishing license costs $75 a year.
  • A saltwater fishing license for seven days is $35.
  • A saltwater fishing license for a single day is $10.
  • The cost of a freshwater fishing license is $35 per year.
  • A freshwater fishing license for 14 days is $11.

Colorado fishing license cost:

Colorado Fishing License Cost is a mandatory fishing license required to fish in Colorado. Colorado has the fourth-highest license fee in the U.S.The cost of a Colorado fishing license varies depending on age and license type.

>The cost of a fishing license for Colorado residents-

  • Adult annual fishing license: $36.08.
  • Senior annual fishing license: $10.07.
  • One-day fishing license: $14.23.
  • Extra rod fishing license: $11.11.

>The cost of a fishing license for Colorado non-resident-

  • Adult annual fishing license: $100.57.
  • Five days fishing licenses: $32.95.
  • One-day fishing license: $17.35.
  • Extra rod fishing license: $11.11.

How Much Does A Fishing License Cost?

Every state in the United States charges a different amount for a fishing license. A yearly license costs $24.41 for residents and $56.65 for non-residents on average. If you’re looking for more information about your state, look at the table below, which includes information for all 50 states.

Fishing license Price list 2023 for all 50 states:

Which Is The Best Place To Buy A Fishing License?

The local Fish & Wildlife Department in your state is the best place to get a fishing license. You may go to their website to learn more about the various licenses that are available and how much each one costs. The best part is that their website generally allows you to buy online and have the license sent to you via mail.

If you’re in a hurry or want to purchase your license in person, another smart alternative is to head to your local Walmart or Cabela’s sports department, where you can get a fishing license for the same fee as you would at your state’s Fish & Wildlife authority. Finally, many tackle stores are approved sellers where you may get a fishing license.

Can You Get A Lifetime Fishing License?

In certain jurisdictions, you may receive a lifetime fishing license, but not in others, because each state has its own set of recreational fishing restrictions. In 32 states, a lifetime license is now available.

What States Have A Lifetime Fishing License?

In one form or another, the following 32 states provide a lifetime fishing license:

It’s vital to keep in mind that the details of who qualifies for a lifetime fishing license (as well as the cost of the license) might differ significantly between states.

The majority of states only provide citizens with a lifetime license (though some let you keep it, if you move away at a later date). Only four states (Maine, Mississippi, North Carolina, and Virginia) now grant non-residents a lifelong license.

How much does a lifetime fishing license cost?

Also Read: Cost of Mounting Fish List by Species

How much is a one-day fishing license?

Frequently asked questions:-

What does a youth need to do to fish legally?

The first thing a young angler should do is check with the state’s department of natural resources for a list of what kinds of fish they can catch and how many they can keep. Some conditions may allow only one type of fish, and others may allow two in their possession at any given time.

To fish legally, they will need to buy a fishing license and a stamp from the government’s website.

Is a license necessary to do fishing?

Licenses are required to fish in lakes, rivers, and oceans. Fishing licenses are available from the state or federal government.

Some fishing licenses are not required if you fish from a boat on a lake or river, if you fish from the shore of any body of water with no dam or weir at the mouth with no feeder stream, or if you fish in an area where fishing licenses are not required by law.

License is used to control the number of people who can be fishing in an area at one time and to identify who is feeling where.

Can You Get A Discounted Fishing License?

Yes, there are various methods to receive a cheap fishing license. It’s essential to note that the details vary by state, so we recommend checking the website of your local Fish & Game Department to see what fishing license discounts are available in your area.

In most states, the following persons are eligible for a reduced fishing license:

  • Veterans Seniors
  • Individuals with disabilities
  • Military personnel who are currently deployed
  • Students
  • couples who are married

In addition, several states offer combo licenses that are less expensive than purchasing each license separately. Texas, Virginia, and Washington, for example, have saltwater/freshwater license combinations that are less expensive than purchasing each license alone. Similarly, several jurisdictions provide combinations that contain both hunting and fishing permits, allowing you to save even more money.

Finally, most states provide multi-year licenses, which are less expensive than renewing your license each year. Again, the specifics vary by state, so you’ll need to check with your local state officials to see what licensing reductions are available to you.

What State Has The Most Expensive Fishing License?

California has the most costly fishing license in the US, with an annual resident license costing $48.34 and a non-resident license costing $130.42. This is 98 percent more than the national average of all states for resident licenses, and 130 percent higher than the national average for non-resident licenses.

Is There A National Fishing License?

There is currently no national fishing license that covers the whole United States. If you wish to fish in more than one state, you’ll need to purchase a state license for each one separately.

A petition is now being circulated with the goal of gathering enough signatures to persuade the government to implement a national US fishing license that would include all states, but there is little indication that this will happen in the near future.

Can You Get A Multi-State Fishing License?

While there is no such thing as a multi-state fishing license, certain states have reciprocity agreements, which means that if you hold a fishing license from one of them, you can fish in the territorial waters of many others.

Anglers having a saltwater fishing license from Connecticut, Rhode Island, or New Hampshire, for example, are allowed to fish in Massachusetts’ coastal waters, and there are numerous additional examples of reciprocity. Check out US Harbors’ guide for further information.

This is especially critical if you want to fish in New England’s coastal waterways, which are shared by many states. On a fishing excursion like that, you can find yourself fishing in three or four different states on the same day.

How much does a Fishing license cost?

The cost of fishing licenses varies depending on the type of license, as well as where you’re buying it from. The cost of the permit depends on your age. For example, for ages 16 to 60, The price of a digital license is determined by how long the period for the week lasts.

An annual resident fishing license is valid from April to March in the following year. It may be redeemed for 12 consecutive months on any day for that period or until it is surrendered or resold.

A fishing license fee allows someone to do fishing in a particular state or country. One person uses it and can be bought only after passing an exam at 16 or older.

How Much Is A Fishing License At Walmart?

A 50-cent processing fee is applied to the usual purchase of a state fishing license by Walmart. So, with a 50-cent processing charge, the cost of a fishing license at Walmart is about the same as it would be through your state’s Fish & Wildlife Department.

If you want to know how much you’ll have to pay for a license at your local Walmart, look at table 1 above, which includes all 50 states, and just add $0.50 to get the entire price.

It’s worth noting that the price you’ll pay is set by the state in which the Walmart shop is located. For example, if you want to buy a fishing license in Florida, you’ll pay the same amount as the Florida Fish and Wildlife Conservation Commission (plus a $0.50 processing charge) at any Florida Walmart.

In most situations, Walmart also includes a little pamphlet with price information for the many types of licenses available (such as 1-day, 7-day, annual, etc.). This information is identical to that found on your local Fish & Game department’s website.

Does fishing license cost depend on age?

The cost of a fishing license for seniors varies in different states. Some states charge additional fees for the senior citizen’s fishing license, while others offer discounts. The price also changes depending on how long the permit would need to be used.

A fishing license may cost as much as $18 per year in certain states, while some states charge a maximum of $11 per year. The fishing license cost for seniors varies by state and age group. In some places, the price is meager than what it costs for a regular adult’s licensing fee.

Conclusion

A fishing license is an identification that proves you have the right to fish. In other words, a fishing license is a license that provides the authority to probe how much this license costs; it varies from state to state. Some states charge less, while some charge more.

So if you’re thinking about fishing or going out and trying it for the first time, then I hope this posting has given you some insight into whether or not you require a license.

Now that you know the value of the fishing license and how much it would cost you, I hope that you will legally buy one if you plan on fishing at any point. Just make sure that you protect yourself and stay safe out there. Have fun and happy fishing!

Walleye Teeth Facts: Everything You Need To Know

The Walleye is a popular game fish that is endemic to North America. They may be found in a variety of waterways, and you can even go ice fishing for walleye.

They may grow to be fairly enormous, with some examples reaching 80 centimeters in length. Their look is defined by huge, outward-facing eyes.

The mouth of a walleye is filled with reasonably sharp teeth. Anglers should be cautious while handling walleyes since they might appear menacing. Walleyes need keen teeth to seize and retain their food as predators. Both the upper and lower jaws have obvious walleye teeth.

Do Walleye Fish Have Teeth?

Yes, walleye have rows of long canine fangs extending from both the upper and lower jaws, as they are carnivorous fish. When hunting, these canines are employed to catch and hold live prey fish. Walleye teeth, on the other hand, are more rounded at the tip than pike teeth and offer less of a threat to humans or the fishing line.

Along with their upper and lower jawlines, walleye have a lot of tiny canine teeth. A walleye can have between 30 and 40 teeth in total. The largest of them can grow to be around half an inch long. While they are sharp, they are also blunt, pointed, and widely spaced.

Because the teeth at the front region of the mouth are frequently larger than the rest, they are the most prominent and conspicuous in walleyes. On both the top and lower front parts of the mouth, there are usually between 2 and 4 of these fang-like teeth.

These fangs give the walleye a vampire-like appearance, and when fishing with live or dead bait, they frequently inflict two deep slashes on the baitfish.

Furthermore, walleye have smaller, more numerous canines that develop along the upper and lower jaws. Even tiny teeth can be discovered behind the cheeks, lower down the oral cavity. These can also develop between the smaller canine teeth on occasion.

Walleye Teeth Facts

  • Walleye, like many other carnivorous fish, have a set of long canines at the front of their mouth that are easily apparent. Just at the front end of the mouth, there is a noticeable collection of 4-8 long pointed teeth that are well-positioned to grip and hold tiny prey fish.
  • The enamel and dentine sections of walleye fish teeth are similar to those of other vertebrates. They can, however, replenish themselves continually throughout their lives, unlike mammals and humans. To put it another way, walleye may shed them and regenerate them. They do so at a sluggish rate continually, and there’s no indication that this shedding and regeneration follows a seasonal pattern.
  • There are sets of shorter canines between them, as well as even smaller ones inside the mouth cavity and on the surface of the gill rakers, in addition to their long canines. All of these are designed to aid the walleye in clinging to squirming prey fish with a slick surface.
  • The head of its prey is swallowed first by the walleye. When they capture a live fish, they must maneuver it around until its head points down the gullet, and their teeth are intended to keep the struggling prey from escaping.

Also Read: Rigging Guide For Walleye

How Many And What Kind Of Teeth Do Walleye Have?

Walleye can have up to 40 canine teeth in total. The largest ones can reach a length of half an inch (1.27 cm). The large ones are separated by a considerable distance. This figure comprises huge canines as well as the teeth that surround them.

Although the points of their teeth appear to be pointed at first glance, they are rather blunt, especially in comparison to pike. Pike’s teeth are likewise closer together.

Walleyes with smaller mouths have teeth as well. They begin to develop them throughout their juvenile years, and as they mature, so do their teeth. As they expand, so does their number. Their tiny teeth are used to hunt insects and extremely small fish when they are young.

Larger specimens have more teeth, larger teeth, and more noticeable teeth in the front region of their mouth. Their favored prey grows in size as they mature.

Smaller teeth might develop to the cheek lines of their mouths. These are normally around a sixth of an inch (4 millimeters) long, but the size might vary significantly.

Deep in their mouth, their teeth are small, measuring roughly 1/16 of an inch in length (1.5 millimeters). These figures are average, and giant walleyes may have larger teeth, while little walleyes may have much smaller ones.

How Big Are Walleye Teeth?

The larger canine teeth of a walleye can grow to be around half an inch long or just short of that, which is pretty large for a fish of that size. Again, truly enormous, previously undiscovered animals might have even larger teeth!

The walleye’s lesser canines are about 1/8-1/4 inch in length. Its tiny, needle-like teeth grow to roughly 1/16 of an inch in length, which is why they are more numerous than the walleye’s larger canine teeth.

Walleye Teeth Pics

1.) walleye mouth 2.) walleye fish teeth

3.) walleye gullet

4.) walleye teeth pics 5.) walleye teeth


Can Walleye Bite Through Line?

The pointed, blunt, and spread-apart teeth of walleyes make them almost impossible to bite through your fishing line. Monofilament, fluorocarbon, and braided mainline are all affected.

Of course, like with any fish with teeth, the more fish you capture with your line, the more abrasion occurs, so if you’re not using a leader, you should always check your line for weak places around your hook or lure.

Though, you must use the right pound test mainline to avoid line breakage. Even if a large walleye doesn’t bite through your line, its weight and pressure might shatter a fishing line that isn’t strong enough.

Can a Walleye Bite Your Finger Off?

Some anglers, especially those who are new to fishing, wonder if walleye have teeth because they are terrified of being attacked by a fish. Walleye fishermen, unlike pike anglers, don’t have anything to worry about.

As previously stated, their teeth are blunt and pose no major harm to humans. Furthermore, walleye will not bite you on purpose. On the other hand, some prudence and common sense are recommended. If you put your hand into the mouth of a walleye, it will bite you and perhaps leave marks on your flesh.

When it comes to major damage, such as losing a finger, walleyes are incapable of doing so, and you need not be concerned. They can’t bite and break the line because their teeth are so wide apart and the tips aren’t razor-sharp.

This is true for all types of lines, including mono, braided, and fluorocarbon. They can, however, inflict abrasion damage to your line, so examine it periodically while walleye fishing. At the very least, the bit that gets into their mouth.

When walleye fishing, it is not a good idea to use leader lines. They’ll detect it and steer clear of it. Because of its resilience and poor visibility, fluorocarbon can be used as a leader if necessary. In this scenario, metal leaders are unhelpful.

When walleye fishermen encounter line break, it’s mainly due to the fish’s size and the fact that they fight aggressively. In waterways where pikes dwell, walleyes can be found. If you hook a pike by accident, it may bite your line.

Do Walleyes Lose Their Teeth?

A tooth that has been lost by an animal, including humans, will never grow back. Fish species, such as walleyes, are, nonetheless, distinct.

Do walleyes, on the other hand, lose their teeth?

Walleyes may regenerate their teeth for the rest of their life. They spit out their teeth and replace them with fresh ones. This is a long-term process with no discernible seasonal trends.

For the fish, regrowing them offers several advantages. If they accidentally lose a tooth, it will regrow. They wouldn’t be able to hunt successfully if this wasn’t the case and they lost a few.

Furthermore, losing and regrowing teeth allows them to always have strong and healthy teeth for hunting.

When the walleyes aren’t biting, there are some rumors regarding seasonal tooth shedding, and you’ll probably run into folks who believe it, but such claims are bogus. The same reports abound about pike teeth shedding in the middle of the summer.

If the walleyes aren’t biting, you may be using the incorrect lure, looking for them in the wrong spot, at the wrong time of day/year, or the water just lacks oxygen, making the walleyes feel sluggish. For new fishers, it’s critical to dispel these fallacies.

Are Walleye Teeth Poisonous?

The teeth of a walleye fish are huge, thin, and blunt, and they appear to be venomous, but are they?

The basic explanation is that the teeth of a walleye are not harmful. They don’t create or release any venom that may injure you if it got into your system. However, there have been reports of certain negative side effects from walleye bites.

So, what could go wrong?

Walleye may irritate your skin, causing abrasions and even wounds. Bacteria can enter via these wounds and cause a variety of diseases. When you go fishing, your hands get wet and muddy, and your expedition might last several days.

If the wound is exposed to all of these factors, it is very likely to become infected. You’ll notice that the region is bloated and uncomfortable, and pus may appear.

Simply put, this indicates that your wound has become infected. If you have a serious illness, you should seek medical guidance and, more than likely, medications will be required.

It’s vital to note that any fish bite might result in infection if the wound isn’t properly treated.

When you’ve been bitten by a fish, rinse the wound with clean water and wrap it with a bandage or anything to keep it clean. Because the bandage must be kept clean, it should be changed frequently. It’s preferable to let the wound “breathe,” but if you can’t keep it clean any other way, covering it makes sense.

This is true of any open wound you receive when fishing, not only those caused by a fish bite.

Can We Touch Walleye? How to Unhook it Properly?

Walleyes are not harmful, as previously stated, and you are allowed to contact them.

Avoid placing your hands in their mouths. If you’re worried about bites, you can always handle the fish using gloves. Rather than using your hands to unhook it, you may use pliers.

It’s not always simple to get rid of the hook. Anglers that use live bait will understand what I’m talking about. Fish can swallow it whole, and the hook can sink to a great depth.

To unhook a walleye, you must first learn how to hold it.

Small specimens can be handled behind their heads without difficulty. Make sure your fingers are firmly gripping the fish in front of the dorsal fin, around the body.

Due to their diameter, larger specimens cannot be handled in this manner. If you don’t want to plant the fish, you can slide your fingers beneath it and hold it behind the gills. The fish is held beneath the belly with the other hand.

If you’re doing catch and release, you can’t utilize the gill approach since it might hurt the fish. If you move your fingers too far down, you’ll reach the red section. Experienced fishermen may regulate this action by sliding their fingers beneath the gill cover, but this is not recommended for novices.

Use a net to bring the fish out of the water if you wish to release it, and gloves if you’re still terrified of bites. You must unhook the fish after it is out of the water.

Walleyes have a protective skin layer that can be damaged if handled incorrectly or with too much contact. This is crucial for people who are going to release it. While holding the fish with one hand, remove the hook using pliers.

Additional resources:

How to Spool a Baitcasting Reel: A Beginner’s Guide 2023

Have you ever wondered how to spool a baitcasting reel? It’s a process that’s not complicated. Among those fishing methods that appear difficult at first, it’s pretty simple if you learn how to do it right, and you can do it in minutes.

Anyone who fished with an exposed spool reel knows how frustrating it is when the line tangles upon itself. What’s worse is that the line tangles can even occur without a fish on your line, which wastes enormous amounts of time. This can lead to you missing opportunities to catch fish and cause problems when you’re trying to land a big one later in the day.

This is a simplified yet informative guide to spooling a bait caster. Included are basic directions on doing it correctly.

Spooling a baitcasting reel

The baitcasting reel is the favored option for experienced fishers, but novice anglers don’t generally understand the device’s usefulness. Many think it’s just another way to spend money without getting much efficiency, especially since they can make do with a spinning rod and reel.

Using a bait-caster often doesn’t seem as easy or natural as working a spinning reel; anglers have a tough time keeping the bait on the spool and keeping the line where it should be. However, if you’re interested in getting into casting and want to know how to spool a baitcasting reel, read on.

Spooling your reel correctly can be daunting if you’ve never done it before, but I’ll walk you through the steps to get it right.

Step 1:- Put the line properly.

Setting the line to your bait caster reel takes a lot of skill and practice. If you set it wrong, you will most likely have difficulty getting a good take from the fish and will probably break a lot of guides.

The first step to spooling your reels should be placing your line through the guide. This ensures that your line will be evenly distributed on the reel, which is incredibly important for accuracy and fish-catching ability.

Step 2:- Wrap the line.

The next step is to wrap the line around the spool clockwise. You need to adjust the amount of line you are wrapping depending on the size of your spool.

The most important part of this step is to get the line threaded on correctly. You don’t want the leader hanging too low or too high, the cast will be off, and you won’t catch anything.

Always make sure the line is not tangled. If there is a large knot, open it up and gently place it back together, pulling the rest of the line through.

The way you thread the line on a bait caster reel depends on whether or not it has holes to help you get the line started. If there are holes in your reel, take one end of the line and skewer the end through a hole. Then, pull the line to the other side of the spool and tie it with a secure knot over a knot.

Step 3:- Pull the line to keep it tight.

Reeling can be challenging if you’ve found yourself on a tangled fishing trip. If the line stretches too much, you’ll have to use one hand for reeling and the other for cutting off loops. This arrhythmic motion often creates tangles when the line reaches the reel. To avoid tangles, tighten the line in front of the reel before casting and keep it taut during your journey.

To reel in a fish effectively, you must be able to pull in the fish line and have it stay taut. This is where line guides come in. Line guides originate from the spool of your fishing rod and help the line stay taut as you reel it in.

Make sure that the line on your reel is under tension while you reel. This helps prevent loose loops and keeps the line from being pinched.

Step 4:- Start spooling.

When you first wind up the spool of line, keep tension on the handle like in step 3. After that, start winding slowly until you feel tension from the line being pulled from the spool. When you finally get your bait caster, it may take a few times to feel comfortable.

It’s essential to maintain some tension during this process, so you don’t wear out your casting mechanism. You should keep tension on the line during this process to adjust as necessary.

Step 6:- Continue spooling close to the brim.

Keeping the line from piling up on the spool is crucial when spooling a bait caster. This pileup leaves a 1/8th inch gap between the spool’s edge and the line. This technique prevents line buildup and helps to prevent backlash when casting.

Also Check: What are the best baitcasting reels for beginners?

Best line for baitcaster

One of the main issues for fish is the right lines for the bait-caster. You can have trouble setting and managing your hook if you take the wrong one. You will spend a lot of energy on fishing and, in the end, waste your time. If you choose the right fishing line for bait-caster, everything will be easy for you. The lines can be-

Braid line:

Braid lines are among the types of lines used in fishing. They are fragile but solid and don’t stretch out when you cast a bait with them. Typically, these lines are much more expensive than mono lines; however, the braided line gives you more strength and less visibility than other fishing line types. Because it is so thin and spooled tightly, it is usually twice as strong as monolines even though it weighs much less. we have reviewed the top 10 best braided lines for baitcasting reel to choose from.

Braid lines are manufactured from a continuous blend of fibers that give them abrasion resistance and stiffness. They are preferable over monofilament lines because it does not absorb moisture or stretch. Aside from those features, braid lines also come with a fine diameter, creating a rounded profile to the cast.

Monofilament line:

Monofilament is another type of baitcasting line. It’s cheaper and easier to use than braid and has lower visibility. It is also simple to use on your bait-caster due to the minimal wind knots formed and lower blowback when you cast it.

It is low visibility, although it has more flexibility than braided lines. The advantage of it is that it floats on top of the water. It is composed of a single fiber strand, making it flexible but less resistant to cutting. Monofilament is helpful for fishing lures that fall on top of the water because they are buoyant, such as topwater.

Fluorocarbon line:

Fluorocarbon is another fishing line different from mono, nearly undetectable in pure water. It sinks and is the most expensive line. However, if you’re using a bait caster with a fluoro-coated spool or live in deep water and want to avoid the problem of sudden wind changes, it’s useful.

Fluorocarbon is different from monofilament in that it has a fluorine molecule in its structure. This fluorine molecule makes the line incredibly resistant to water and abrasion! This type of fishing line is used by bait casting anglers looking for a thinner line that is super sensitive but still strong under a heavy load.

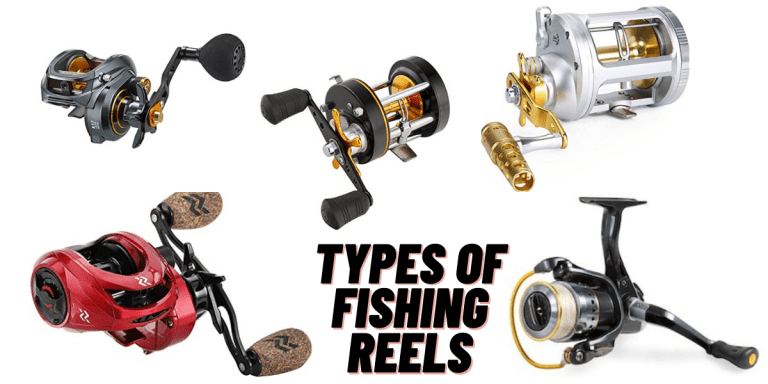
See Also: Fishing Reels Types – With Pictures

Frequently asked questions

Is it hard to spool a bait caster?

Spooling a baitcasting reel is among the challenging tasks for a novice angler to master. The baitcaster has more running less than a spinning or spin-cast reel, making it crucial to line up each turn correctly without leaving any slack in the mainline.

Once the proper amount of running line has been added, run the line through the primary anti-backlash mechanism and gather it onto the spool at different points. With careful attention to winding, you will find that you can cast your line correctly every time.

Which side of the spool should the line exit?

The bail arm or clicker is one of the essential parts of a fishing reel. While many anglers do not realize it, the direction a bail arm rotates can make a difference in how a reel performs.

The correct rotation will allow the line to feed on a spool evenly onto your fishing rod. On the other hand, if the bail arm is turned in the wrong direction, line tension will increase and prevent you from getting any more line onto your reel.

How to spool a braided baitcaster?

If you’ve ever tried to string a baitcaster with braid and wondered how others achieved this seemingly-mighty task, let me tell you how: they started with monofilament! The process is straightforward. Some experienced anglers swear that braid is the best line to use with a baitcaster, while others think monofilament is best.

If you want to do so, repeat the procedure already discussed above, but rather than the braided line, begin with monofilament backing on the baitcaster spool. Braid is harder to work with, and it will be great for making knots.

The final verdict

Many people are scared of baitcasters because they don’t know how to use them. Anyone can learn, and once you do, it opens up a whole new world of fishing. Here’s everything you need to know about spooling a baitcasting reel – including different types of lines that you can use. Also If you’re looking for a new baitcasting reel, then check out our review on the best baitcasters under $100.

Once you understand how to spool a baitcaster correctly and have the necessary equipment, anyone can do the job at home. The best thing about doing it manually is that you won’t have to wait for someone else to assist you, allowing you to go fishing right away!

Additional Resources:

The 6 Most Important Trout Fishing Rigs Setups

Trout fishing has always appeared complex, especially to those who are simply interested in participating in this exciting and enjoyable leisure activity. However, it is not all about having a good time. It also takes a mix of knowledge, skills, drive, and, most importantly, patience.

Setting up fishing rigs and lines is the most common issue that might test an angler’s patience. Only a few people are likely to be familiar with all of the many types of fishing lines and rigs.

What is Trout?

A trout is a broad word that refers to a variety of freshwater animals. The trout is a close relative of the salmon. Each trout has a distinct ability to live. As a result, trout may be found in a variety of forms all across the world.

The lake trout, for example, lives in freshwater lakes and rivers. Others, such as the rainbow trout, can migrate from the sea to freshwater habitats. Trout have different colors and patterns depending on their habitat and surroundings.

It’s difficult to tell what kind of trout you’re looking at just on their coloration and appearance. It might sometimes be difficult to capture these fish. Some fish are difficult to locate, while others may be caught simply around the corner.

Anglers capture three primary species of trout, each with its own set of traits. Brown, Brook, and Rainbow Trout are the three types of trout.

Also Read: A Complete Guide To Lindy Rig Fishing

Where Can You Find Trout?

Trout may be found in both flowing and cold water. Trout may be found in rivers and creeks, where they like running up and down the banks.

Trout is one of the most regularly stocked game fish, and they may be found in lakes as well. Trout can be released in ponds, streams, and other bodies of water.

The more away from a lake or river is from civilization, the more likely you are to discover a trout in the water. Trout fishing is regarded as one of the greatest hobbies for anglers and outdoor enthusiasts as a result of this.

The Brook trout, often known as the speckled trout, is the most common and simplest to capture. Meanwhile, the Cutthroat trout dominates the western half of the nation. Finally, both the Rainbow and Brown trout live in rivers and streams.

Setting Up Trout Rig

A rig is a phrase used to describe the combination or arrangement of fishing equipment or items. A rig can be fixed on a boat, connected to a rod, or carried by hand.

Setting up a trout rig can be done in a variety of ways. However, the procedures and methods that follow are by far the finest available.

Things You Require

A rig is a collection of fishing equipment required for a successful catch. Here’s a brief summary of everything you’ll need to set up your fishing gear and get started with the fishing.

  1. Fishing Rod and Reel: If you don’t already have one, start by picking up a cheap one at a local fishing shop.
  2. Fishing Line: When you buy a set of fishing rods and a fishing reel, the fishing line is usually included. If there aren’t any, get some fishing line with a 5-10 pound test. After that, thread it into your fishing reel. Make sure your fishing line is tidy and ready for trout hunting if you already have one.
  3. A set of hooks: The ideal hooks to use for trout fishing are sizes 4-12.
  4. Bobbers:  A simple bobber will suffice. Simply make sure the bobber is large enough to keep the split shot, hook, and bait from sinking.
  5. Sinkers: Sinkers are the polar opposite of bobbers. The weight of the sinkers should be light enough. As a result, if it’s linked to the bobber, it won’t draw it down.

Steps:

  • Step 1: Begin by attaching the fishing hook to the fishing line’s end. To tie it to the line, you can use a simple knot.
  • Step 2: Create a line that runs from one end of the split shot to the other. Make sure it’s around 10-15 cm above the hook.
  • Step 3: At the end of the fishing line, connect the bobber or float. This is accomplished fast by threading the line through the top and bottom metal hooks.

How To Rig For Trout

If you want to rig for trout, there are three main sorts of rigs to select from:

  • Rigs in which your bait is hung under a bobber or afloat
  • Rigs with a weight that offer your bait close to the bottom
  • Rigs that let you cast an artificial bait and actively retrieve it.

Common Types of Trout Fishing Rigs

Types of Trout Fishing Rigs


1. Sinking bait trout fishing rig:

During hot days, when trout dive to the lake’s bottoms in search of cooler waters, a sinking bait setup is the key.

Things you need:

  • Slip sinker
  • Swivel
  • Hook
  • Bait

Setup:

  • Step 1: To begin, rig a slip sinker and attach the eye to the end of your fishing line. To prevent the sinker from being lost, attach a swivel to the end of the line.
  • Step 2: Attach a 12-18′′ length of fishing line to the opposite end of the swivel and your hook. Ideally, a fishing line with a lower pound test than your mainline, so that if your line breaks, it will only happen at the end of your rig.

Advantage of this setup: With this setup, a trout will be able to eat the bait without experiencing any resistance from the sinker. You also don’t have a visible marking on the surface with this layout.

As a result, it’s perfect for keeping a finger on the line while feeling bites. You may also keep a close eye on the fishing line for any movement.

2. Float fishing rig for trout:

While a slip bobber trout rig requires a little more effort than a simple clip-on bobber, it is a far more versatile and powerful setup for trout fishing. This is especially noticeable in deeper lakes.

A clip-on bobber, on the other hand, might be beneficial for catching trout in a shallow stream or river.

Things you need:

  • Slip bobber or clip-on bobber
  • Bobber stop (for slip bobber)
  • Swivel
  • Hook

Setup:

  • Step 1: At begin, tie a bobber stop to the end of your fishing line, which is included with the majority of slip bobbers.
  • Step 2: You can fish your lure floating in the water, practically as deep as you need, by sliding this up and down the line.
  • Step 3: Slide your bobber on after the bobber stop and secure it with a swivel to keep it from slipping off your line.
  • Step 4: Tie on a 12-18′′ section of fishing line and connect your hook in the same way you did with the sinker.
  • Step 5: You’ll just be controlling your bobber and this small section of the line when you cast, even if you’re fishing your lure much further to the point of your bobber stop.

Advantage of this setup: This is an excellent rig for shallow ponds and streams, as well as any other setting where trout are eating near the surface. It’s simple to set up and a lot of fun to fish with, making it a great choice for a novice pond fisherman.

However, bear in mind that the greatest depth you may fish is equal to the length of your rod since you won’t be able to throw the rig efficiently if the bobber is placed higher.

Also Check: What Are The Top Rod And Reel Combos For Catfish?

3. Lure rig for trout fishing:

If you’re looking for trout using a lure, you may keep things simple by tying the bait directly to the end of your line if that’s all you have. In any event, the lure’s spinning action may produce twists in your line, lowering the line’s breaking quality or possibly causing a major tangle.

Things you need:

  • Variety of trout lures
  • Swivel (optional)
  • Leader line

Setup:

  • Step 1: To link a trout fishing bait to your line, tie a clip swivel to the farthest limit of your line and attach your lure to that. It will, but not entirely, reduce line twists.
  • Step 2: It takes into account a more fair appearance and makes switching between lures easier. You can quickly find out what the trout will prefer to eat at any particular time by rapidly rotating among lures.

Advantage of this setup: This is one of the most adaptable trout rigs, as it can be used in a variety of situations, from little streams to large lakes.

In most situations, you should aim to fish in the center of the water column, but if the trout are staying close to the bottom, you may go deeper.

Other Types of Trout Fishing Rigs

1. Ned rig for trout:

The ned rig is most commonly associated with bass fishermen, but few people are aware that it may also be used to capture trout.

The fact that the ned rig is generally fished with a floating plastic tail, which is perfect for trout, is the main element that makes it so effective for trout.

Things you need:

  • Floating plastic tail
  • Spinning reel
  • Swivel

Setup:

  • Step 1: You may attach your mainline straight to the mushroom jig head of the ned rig if you’re using fluorocarbon as your mainline.
  • Step 2: If you’re using a braided line as your mainline, a 2 to 4-foot fluorocarbon leader is preferable because it’ll be less apparent in the water.
  • Step 3: Cast it out and let it drop to the bottom, then recover it with a jigging motion for 3 or 4 feet and let it sink to the bottom once again.
  • Step 4: Continue doing so until you receive a bite.

Advantage of this setup: This technique works best in lakes, rivers, and streams where trout are eating near the bottom. The only time you shouldn’t use it is if there’s a lot of flora on the bottom since your ned rig will become hooked.

2. Drop shot rig for trout:

Another excellent bottom fishing rig for trout, this one lets you position your lure in the strike zone and maintain it there for an extended period of time. It’s most commonly employed with soft plastic lures, much like the two prior setups.

Things you need:

  • Drop shot weight
  • Soft plastic lure
  • Swivel
  • Hook

Setup:

  • Step 1: Start by tying a double uni knot on your mainline to a 4 or 5-foot fluorocarbon leader, then attaching the end of your leader to a 1/8 to 1/4 drop shot weight.
  • Step 2: Then, with the leader line approximately 1 foot above the drop shot weight, construct a loop with a baited hook pointing upwards.
  • Step 3: From below, pass the loop through the eye of the hook and make an overhand knot with it.
  • Step 4: Finally, moisten the line and pull firmly after passing the hook through the loop.

Advantage of this setup: While the drop shot rig was designed for vertical fishing in deep water from a boat, most bass fishermen will tell you that it can also be thrown from shore and fished in extremely shallow water.

When trout are eating near to the bottom of lakes and rivers, this is a wonderful choice to utilize

3. Trout rig with bobber and jig:

If you’re fishing over weeds, this is a wonderful trout rig to utilize since you can fish it slowly without having the jig snagged.

Things you need:

  • Fixed bobber
  • Jig with soft plastic
  • Swivel

Setup:

  • Step 1: You can use a fixed bobber or a slip bobber depending on the depth of the water. So, instead of putting a baited hook to the end of the line, connect a 1/16 or 1/8 ounce jig head to the end of the line using one of these two bobber rigs.
  • Step 2: After that, you can use any of a number of plastic lures to bait the jig head, and you’re ready to go.

Advantage of this setup: This trout rig is also ideal for drift fishing in streams and rivers, and you can change the bobber set to present the lure just above the bottom of the water.

Choosing The Right Trout Rig

Different trout rigs are best suited for various fishing techniques such as bait fishing, lure fishing, fishing from a boat, and fishing in a variety of bodies of water ranging from little streams to large lakes. However, we understand that deciding which one is ideal for you might be difficult.

If you’re confused about reels types, then take a look at our article on Different Types Of Angling Reels. Also, check our article on spinning reel sizes.

We hope that by reading a thorough explanation of trout fishing rigs, you will have a better understanding of the essentials of what each rig is meant for and that this will help you pick two or three of them that will help you catch more fish in your local trout fishery.

Also Read: